How to set up single sign-on (SSO) with Google Workspace
Last updated: April 20, 2026
Single sign-on with Google Workspace lets your team access Influ2 using their Google Workspace credentials — streamlined login, no separate password to remember.
Before you start, you'll need:
Admin access to your Google Workspace Admin Console and Influ2 account
Your Influ2 client ID (request from your Customer Success Manager)
Set up SSO in Google Workspace
Create a custom SAML app
Go to admin.google.com and sign in with your Google Workspace admin credentials.
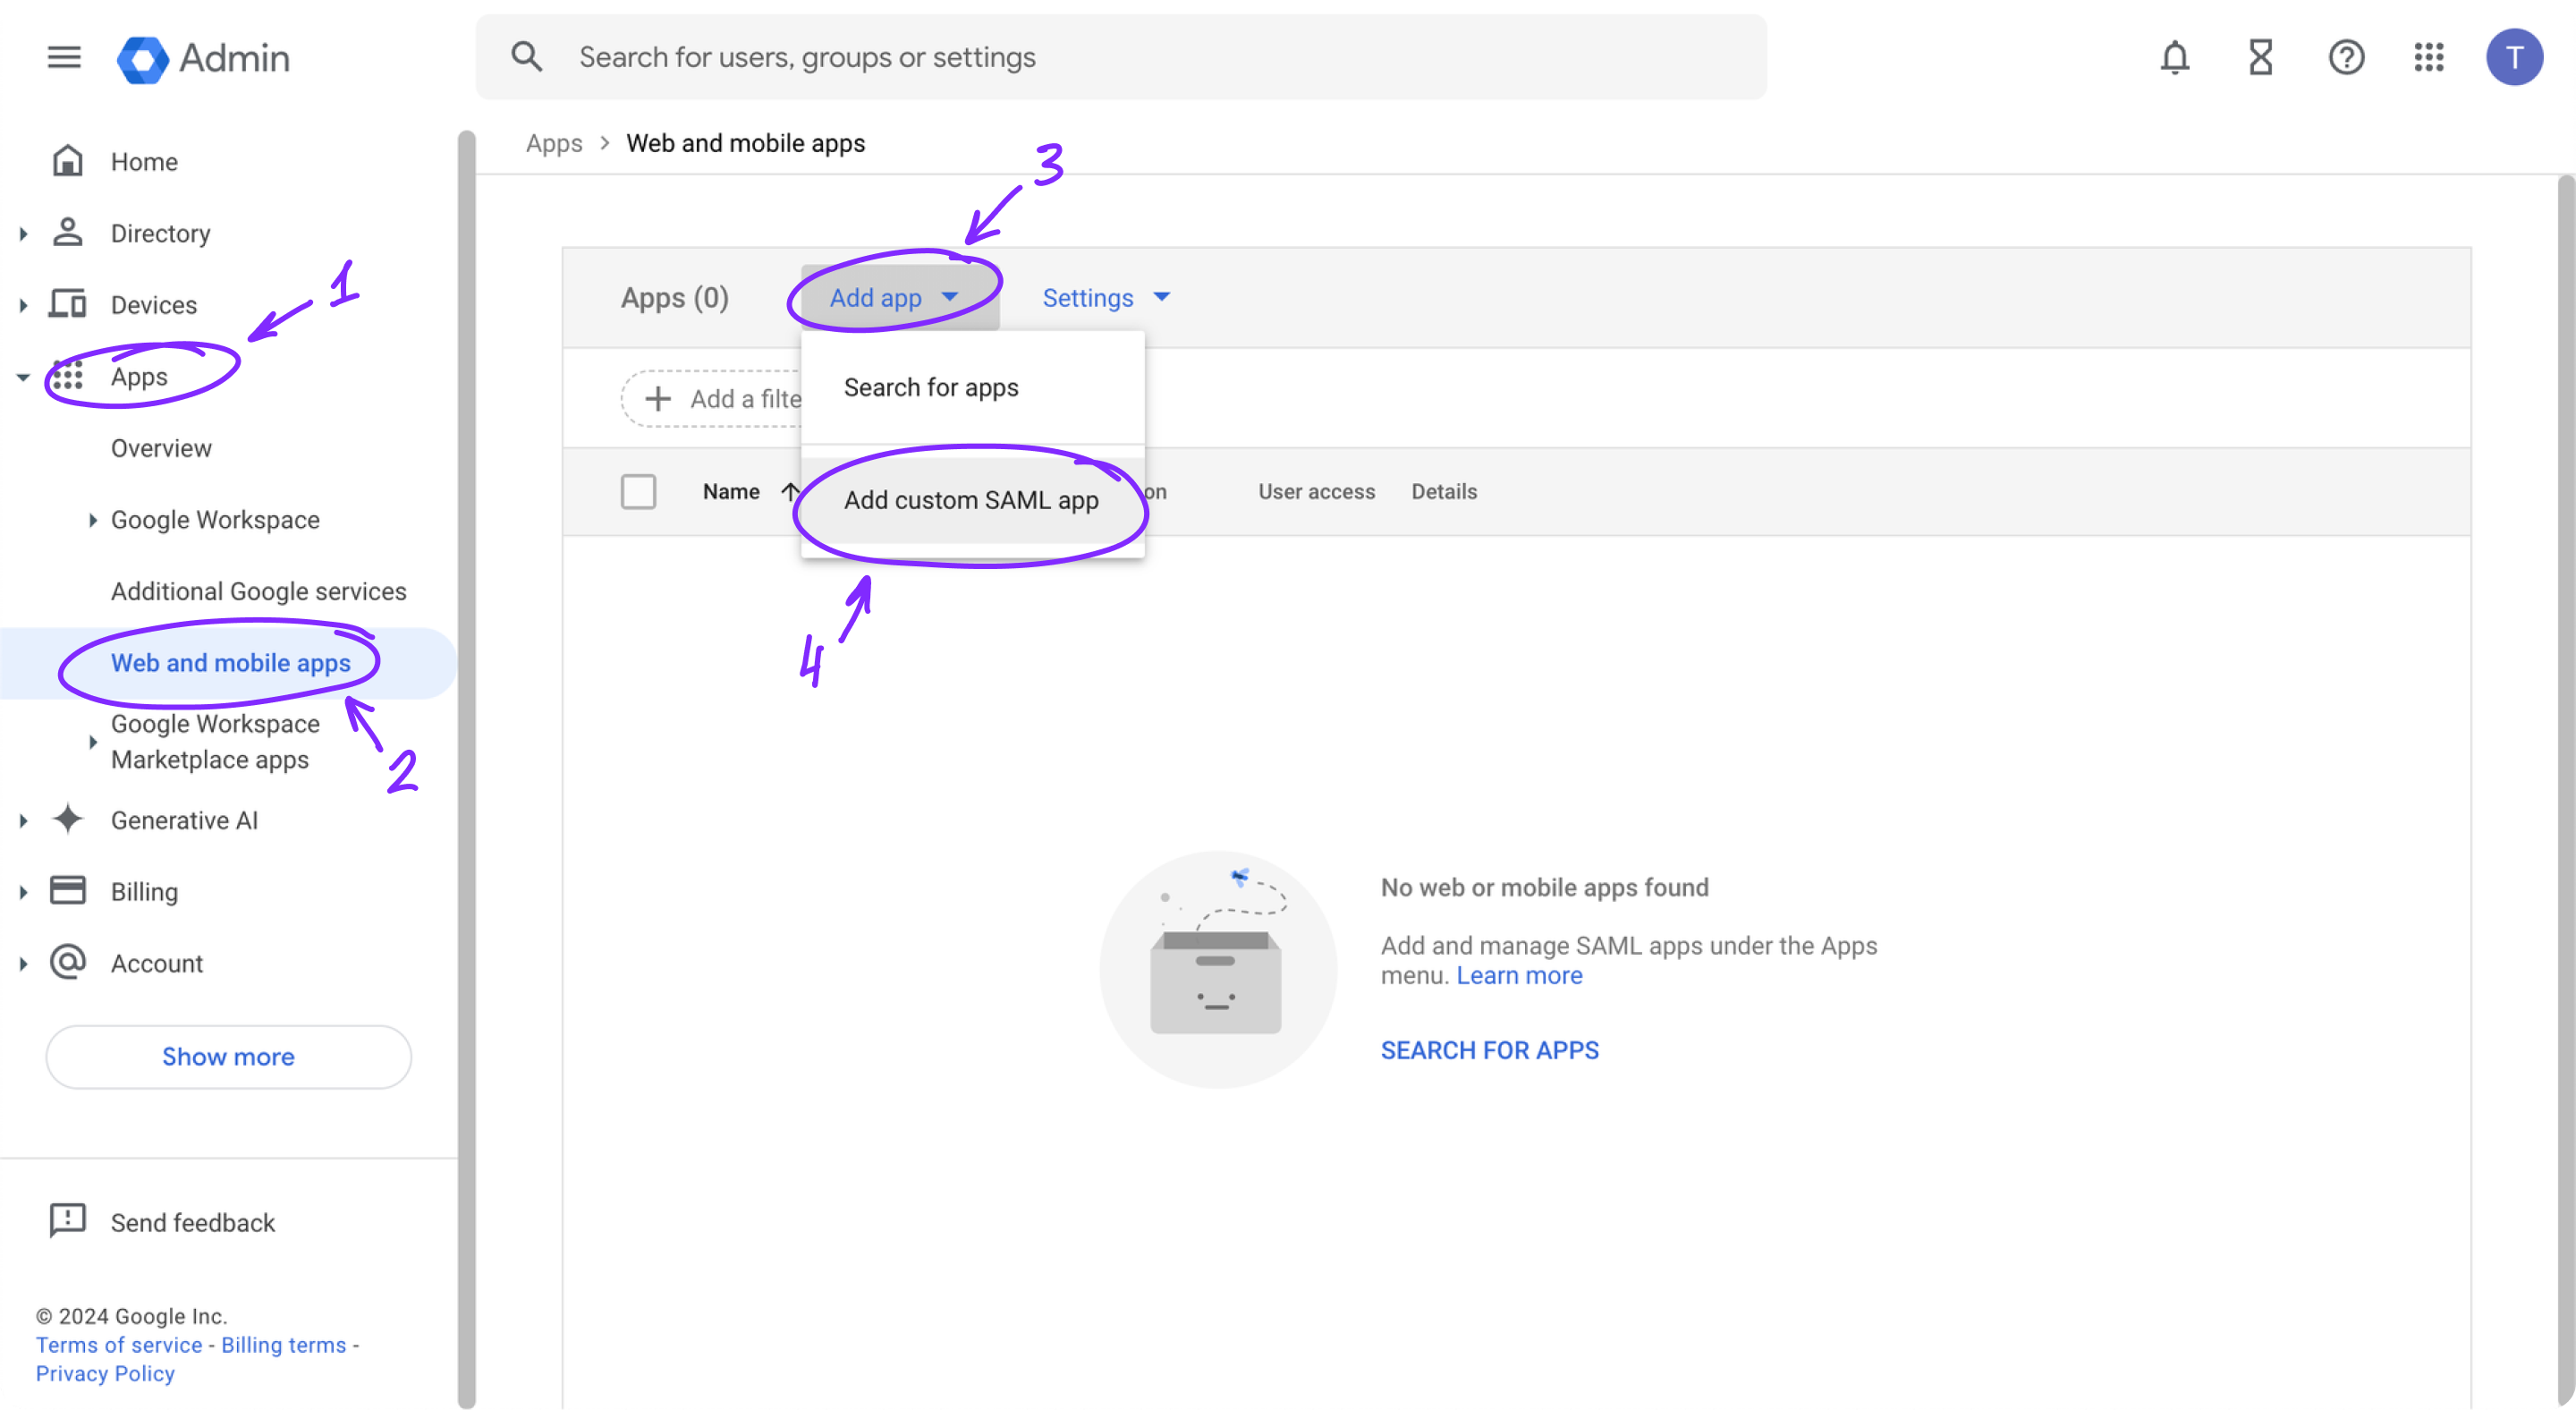
In the left sidebar, go to Apps > Web and mobile apps.
Click Add App and choose Add custom SAML app.
Configure service provider details
Give your app a descriptive name (e.g., "Influ2").
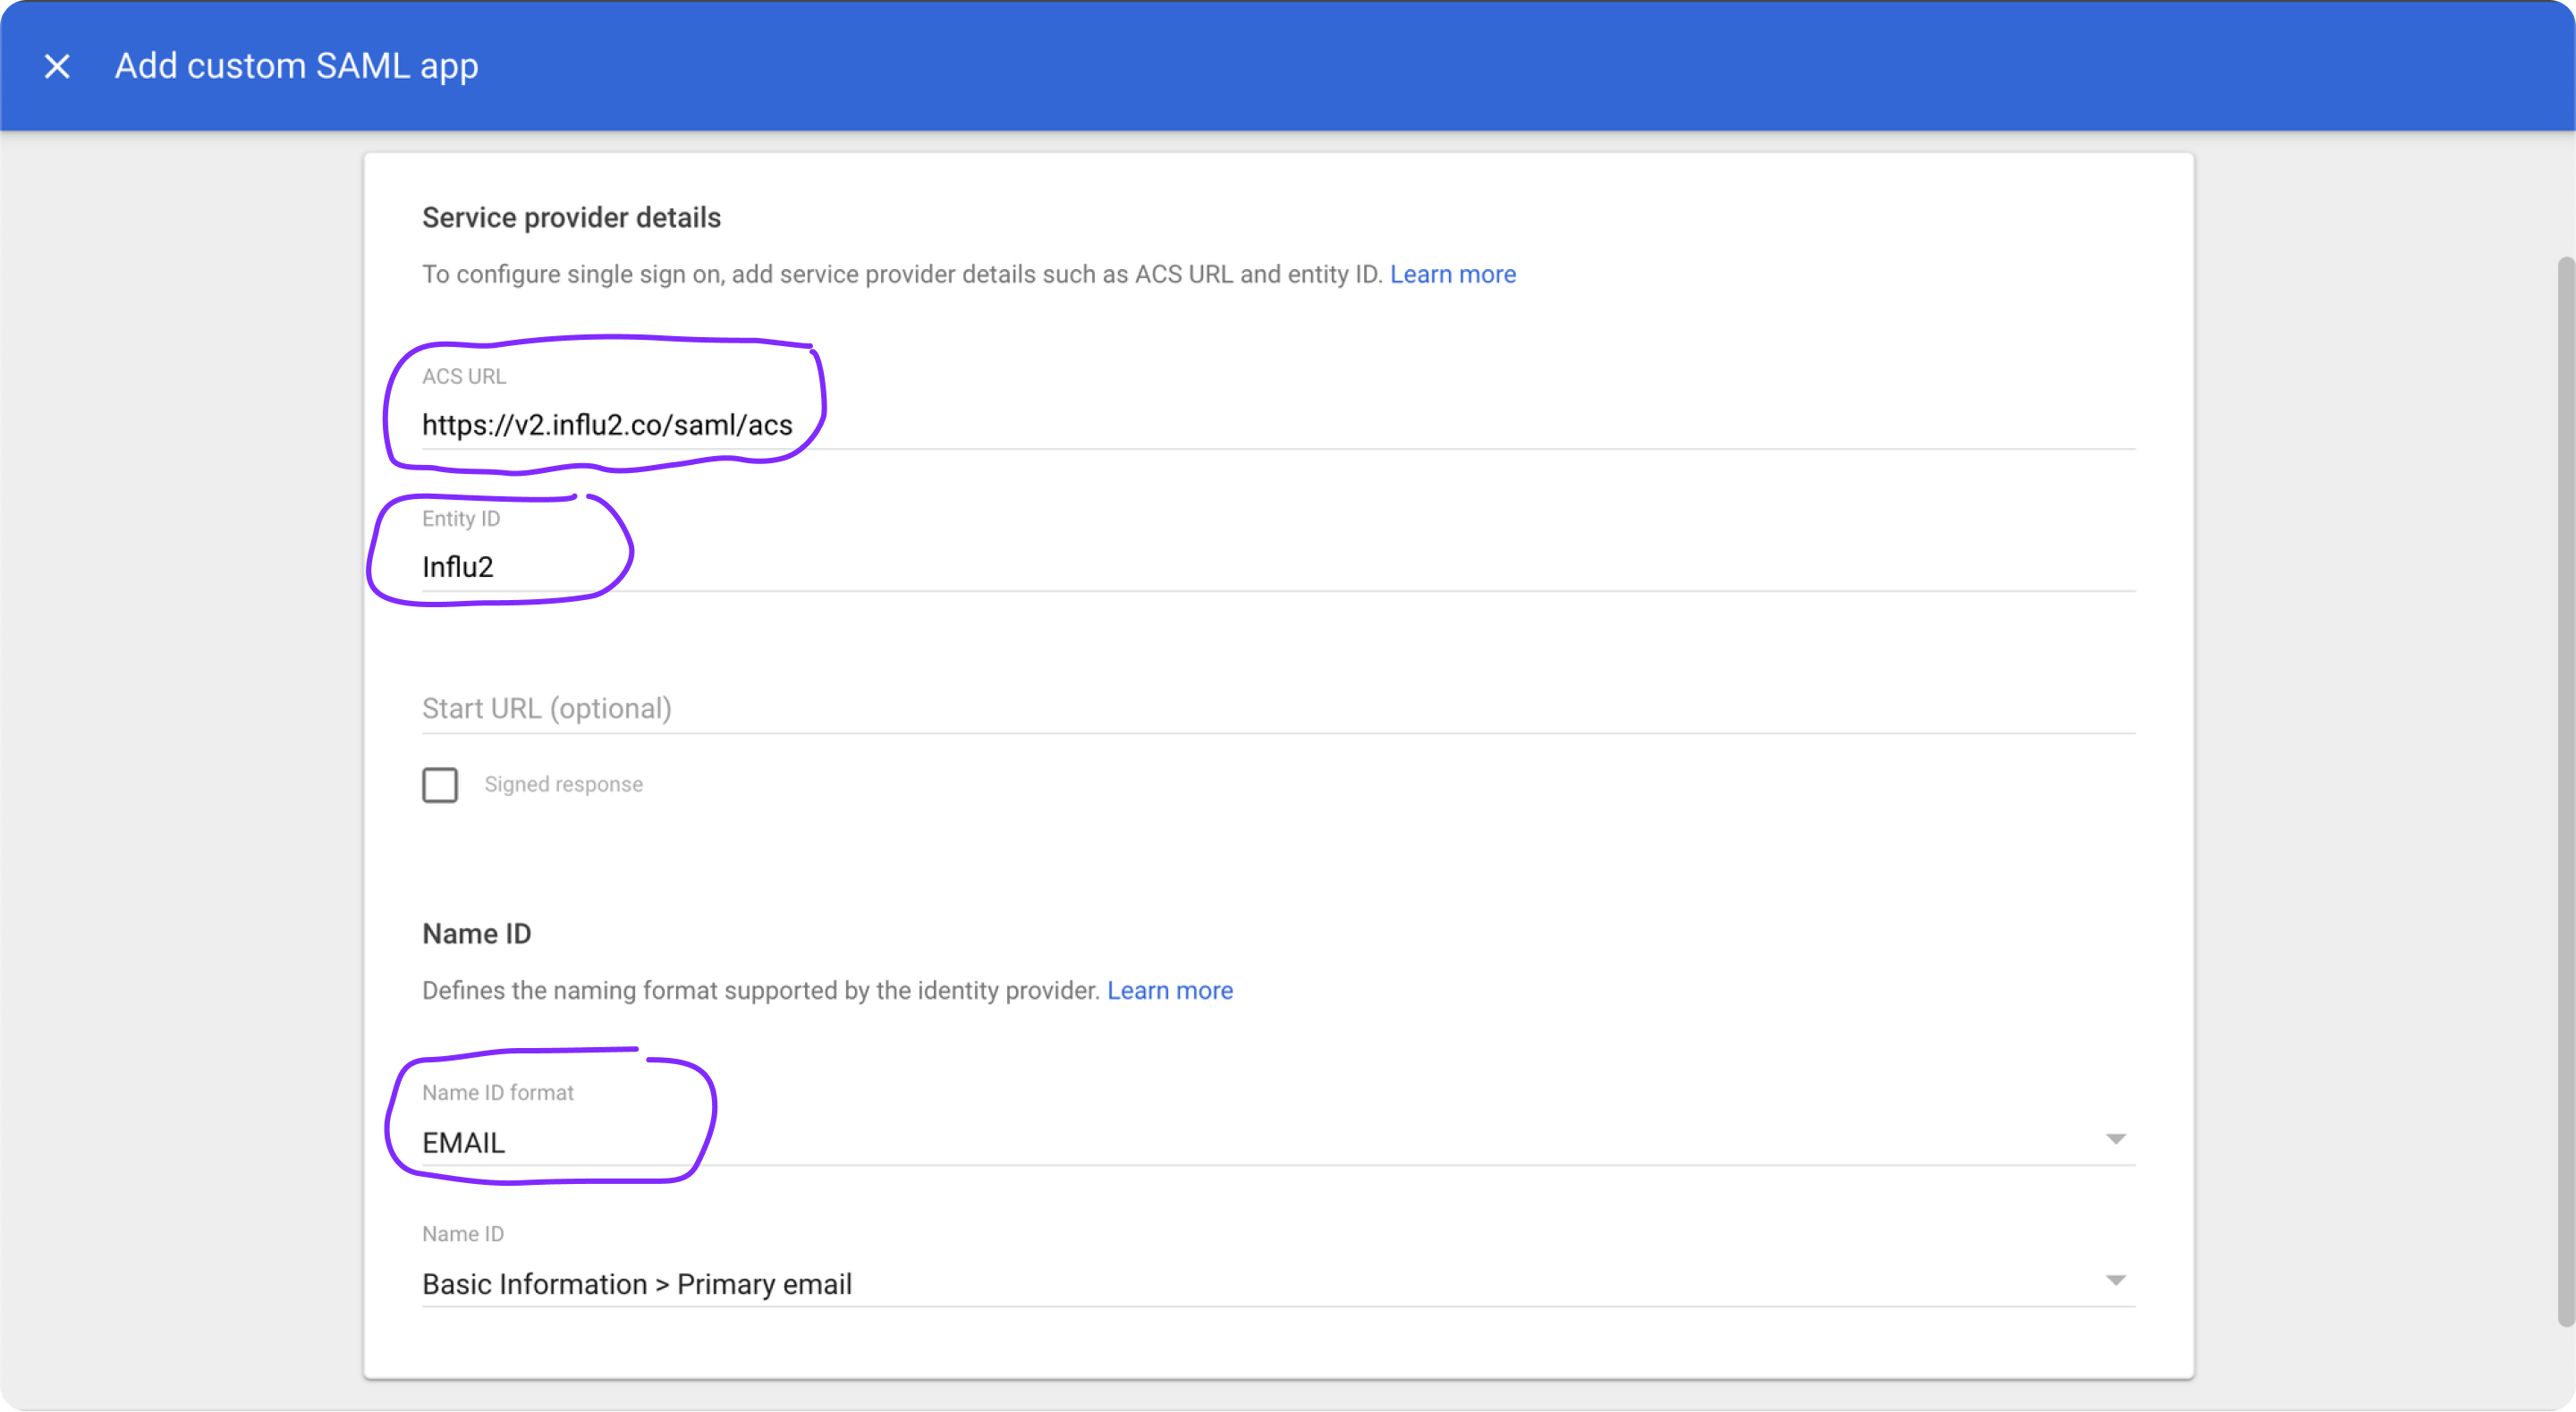
In Service Provider Details, enter the following:
- ACS URL:https://v2.influ2.com/v1/api/client/{{your_client_id}}/samlsso/saml/acs
(Replace{{your_client_id}}with the ID from your Customer Success Manager)
- Entity ID:Influ2
- Name ID format:EMAIL
Configure attribute mapping
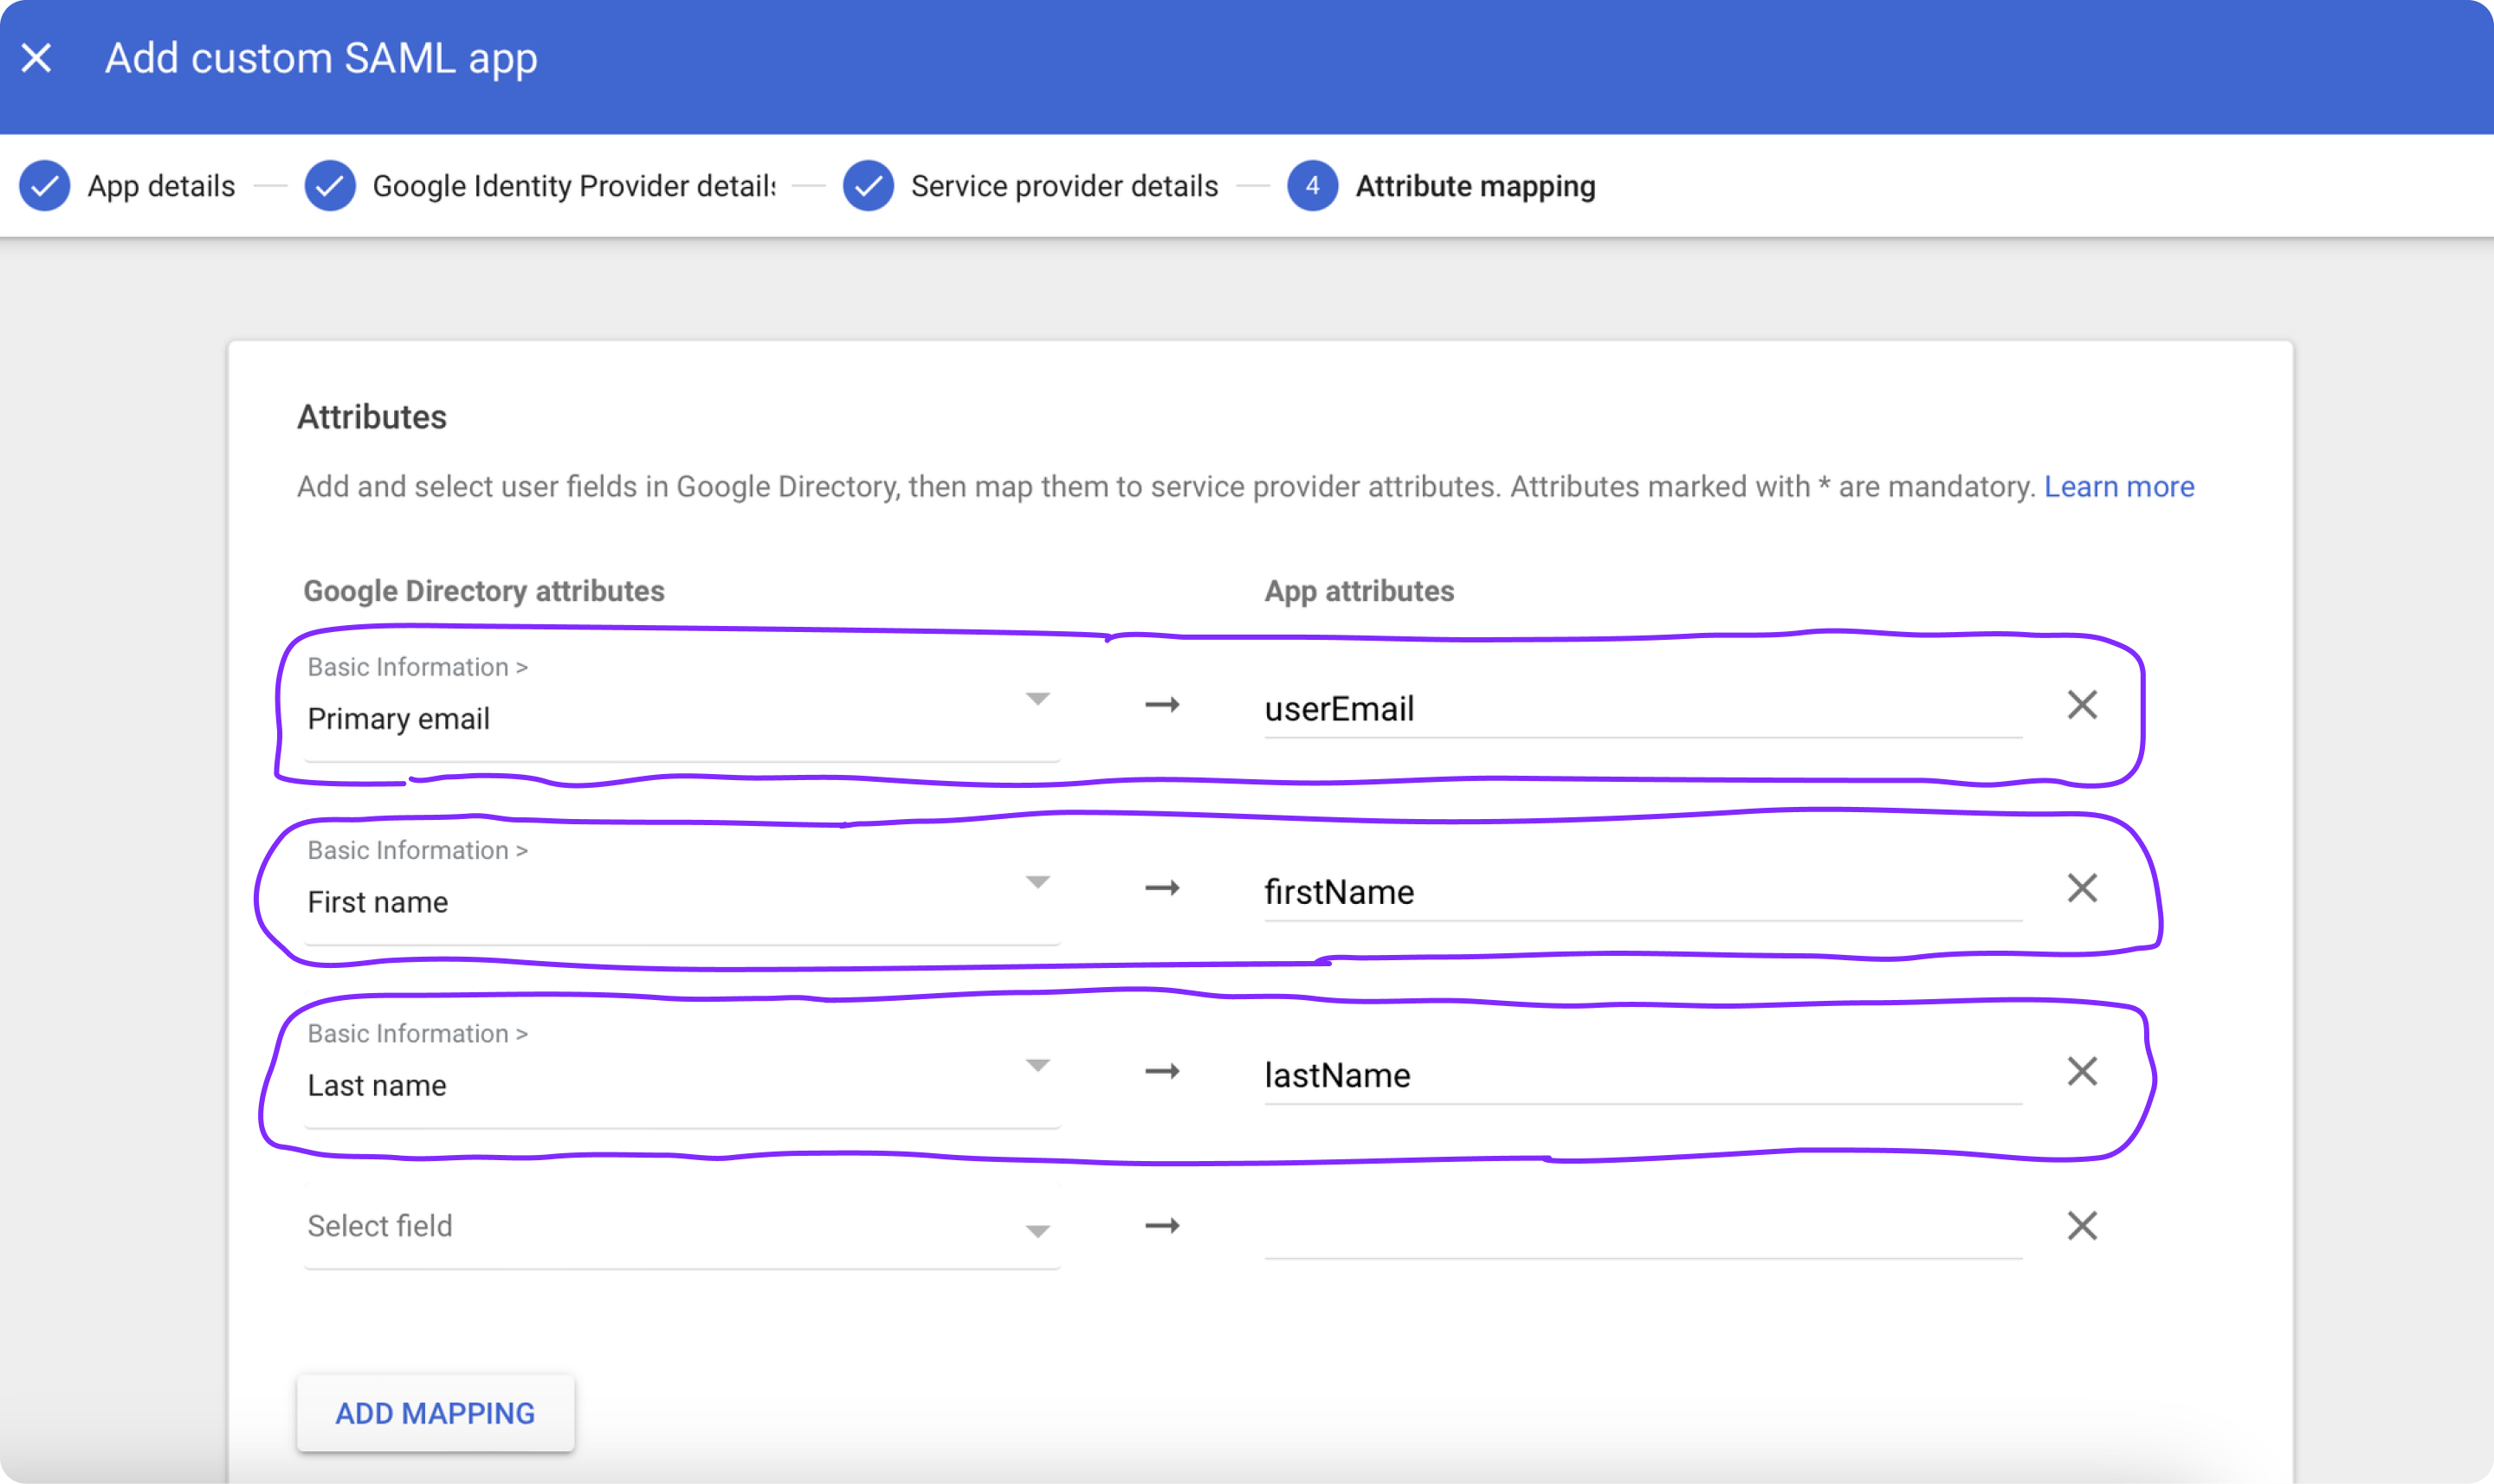
Click Add Mapping and specify these attributes:
- Primary Email →userEmail
- Last name →lastName
- First name →firstName
Click Finish to save the settings.
Assign the app to users
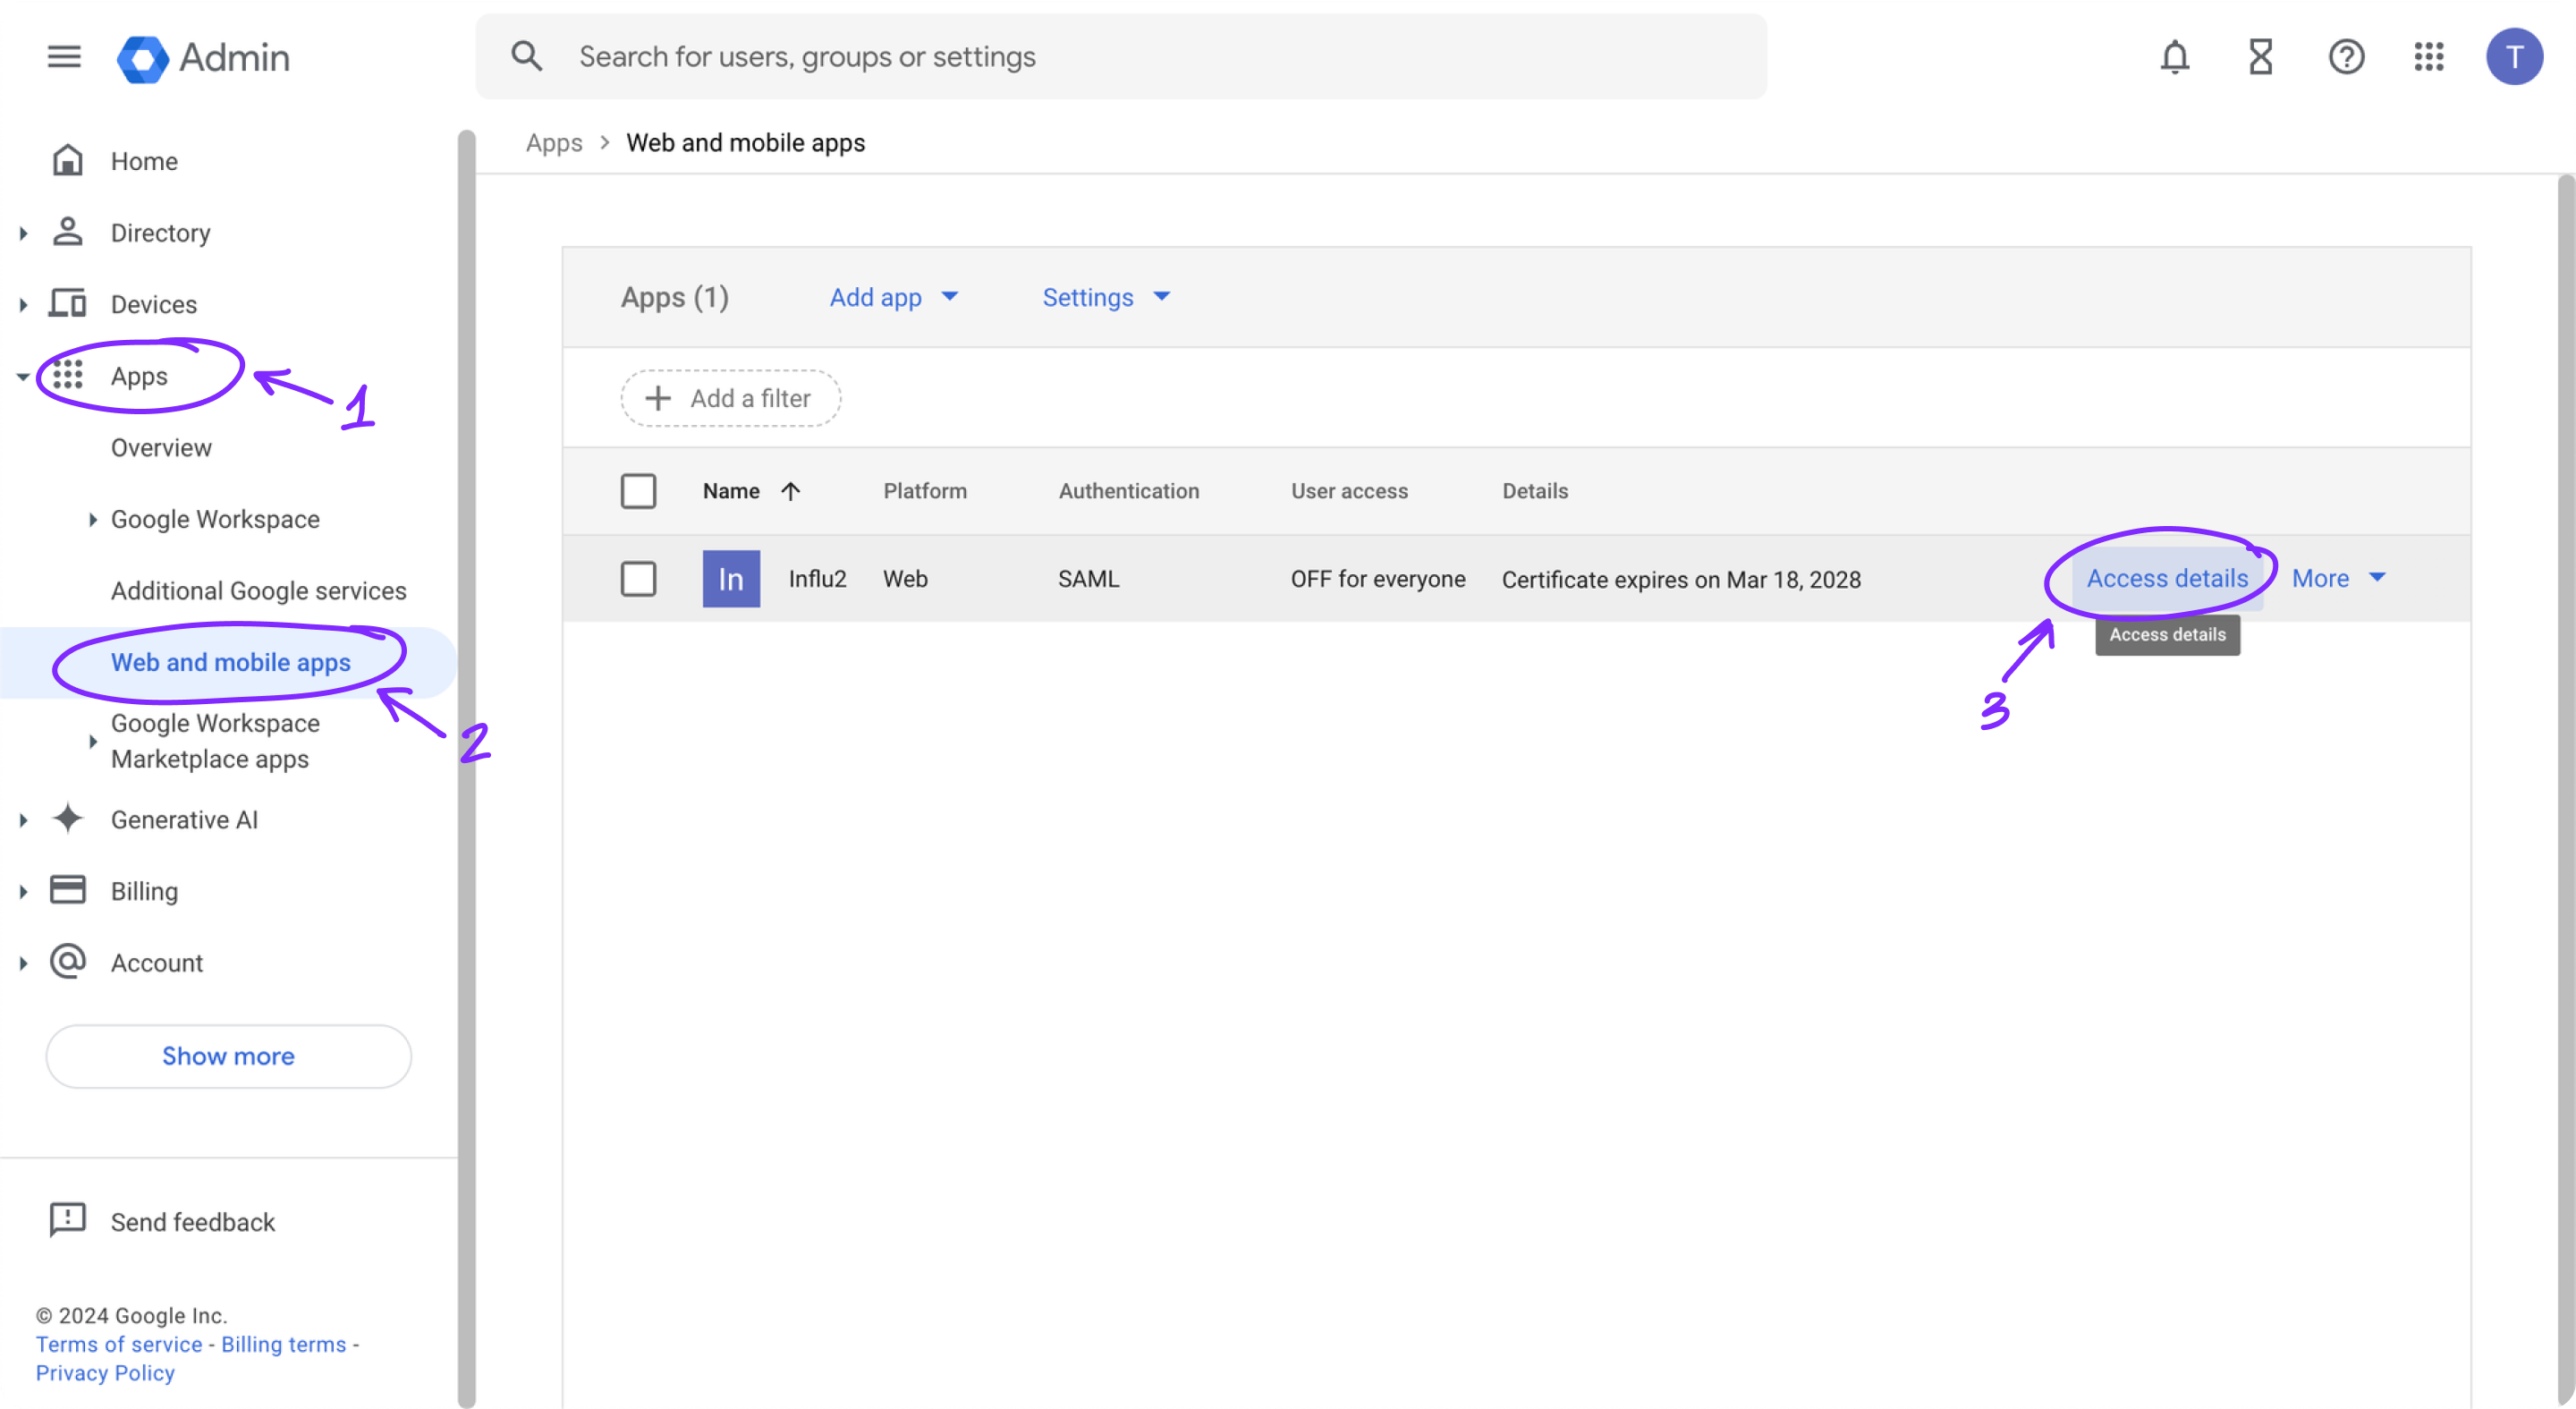
Go to Apps > Web and mobile apps.
Find and select your app (e.g., "Influ2").
Click Access details and assign the app to a specific user or group.
Assign custom attributes for user roles
This step lets you assign specific roles within Influ2 (Admin, Manager, Viewer) to your Google Workspace users.
Create a custom attribute
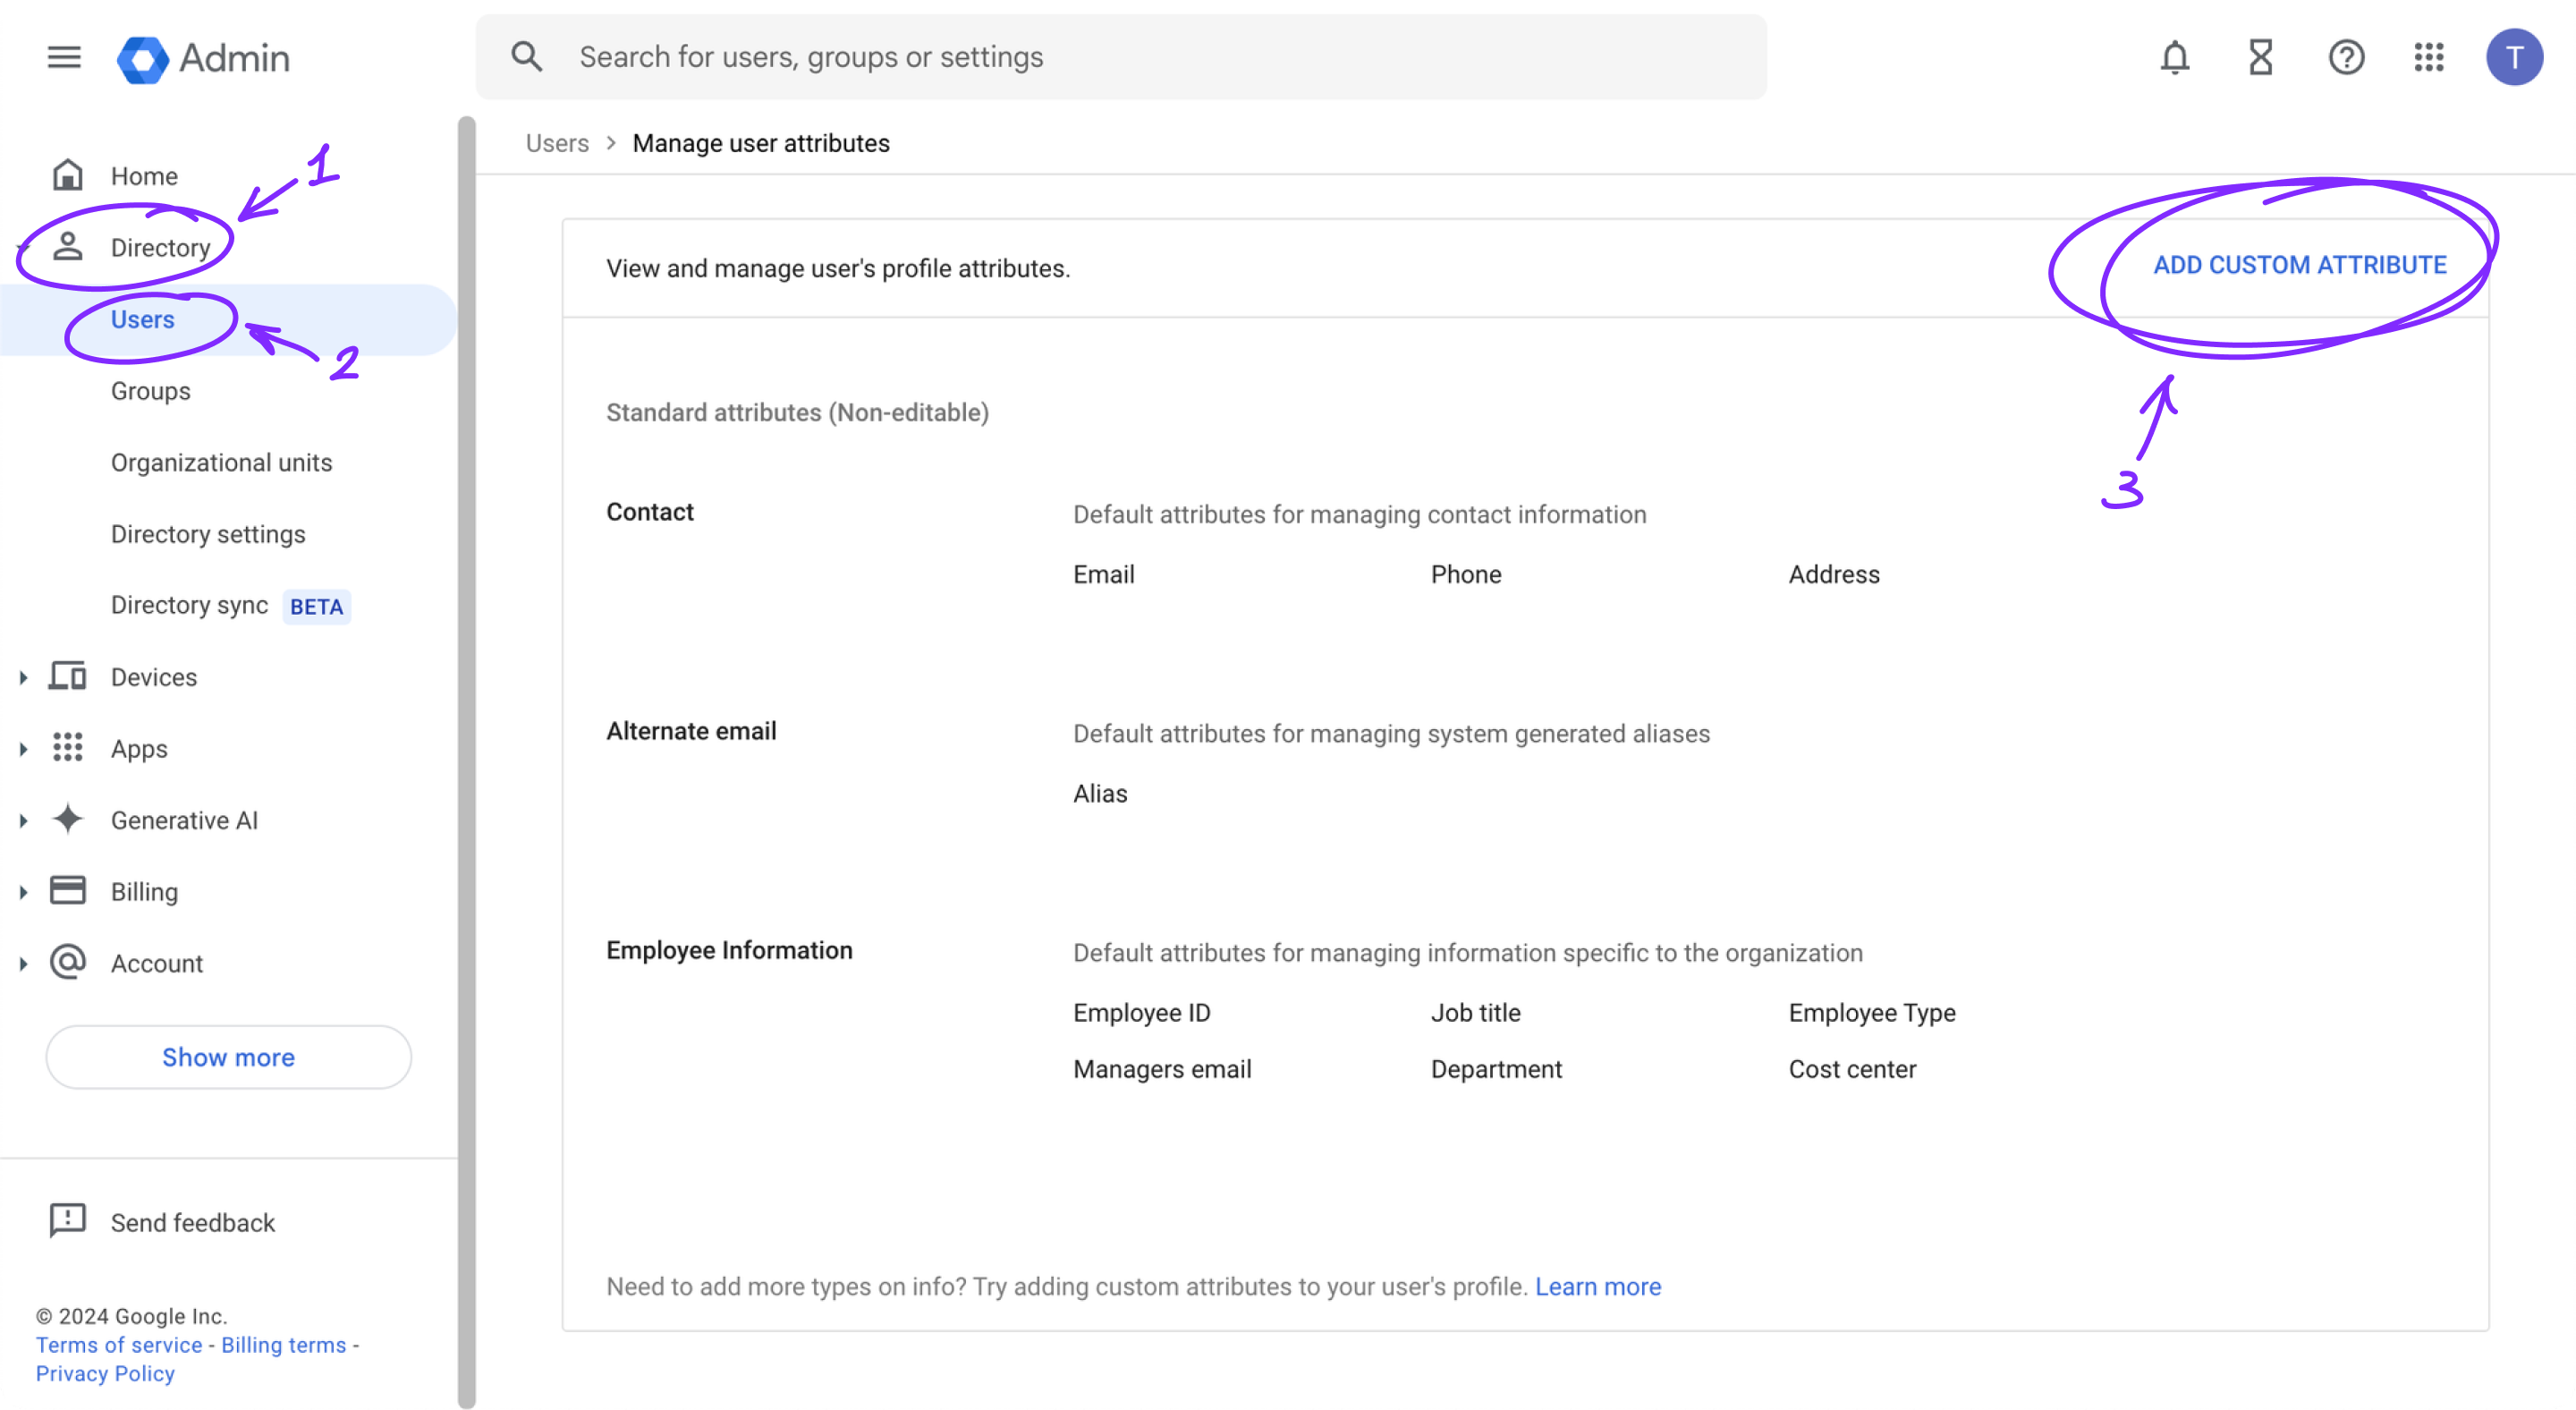
Go to Directory > Users.
Click More options and select Manage custom attributes.
Click Add custom attribute.
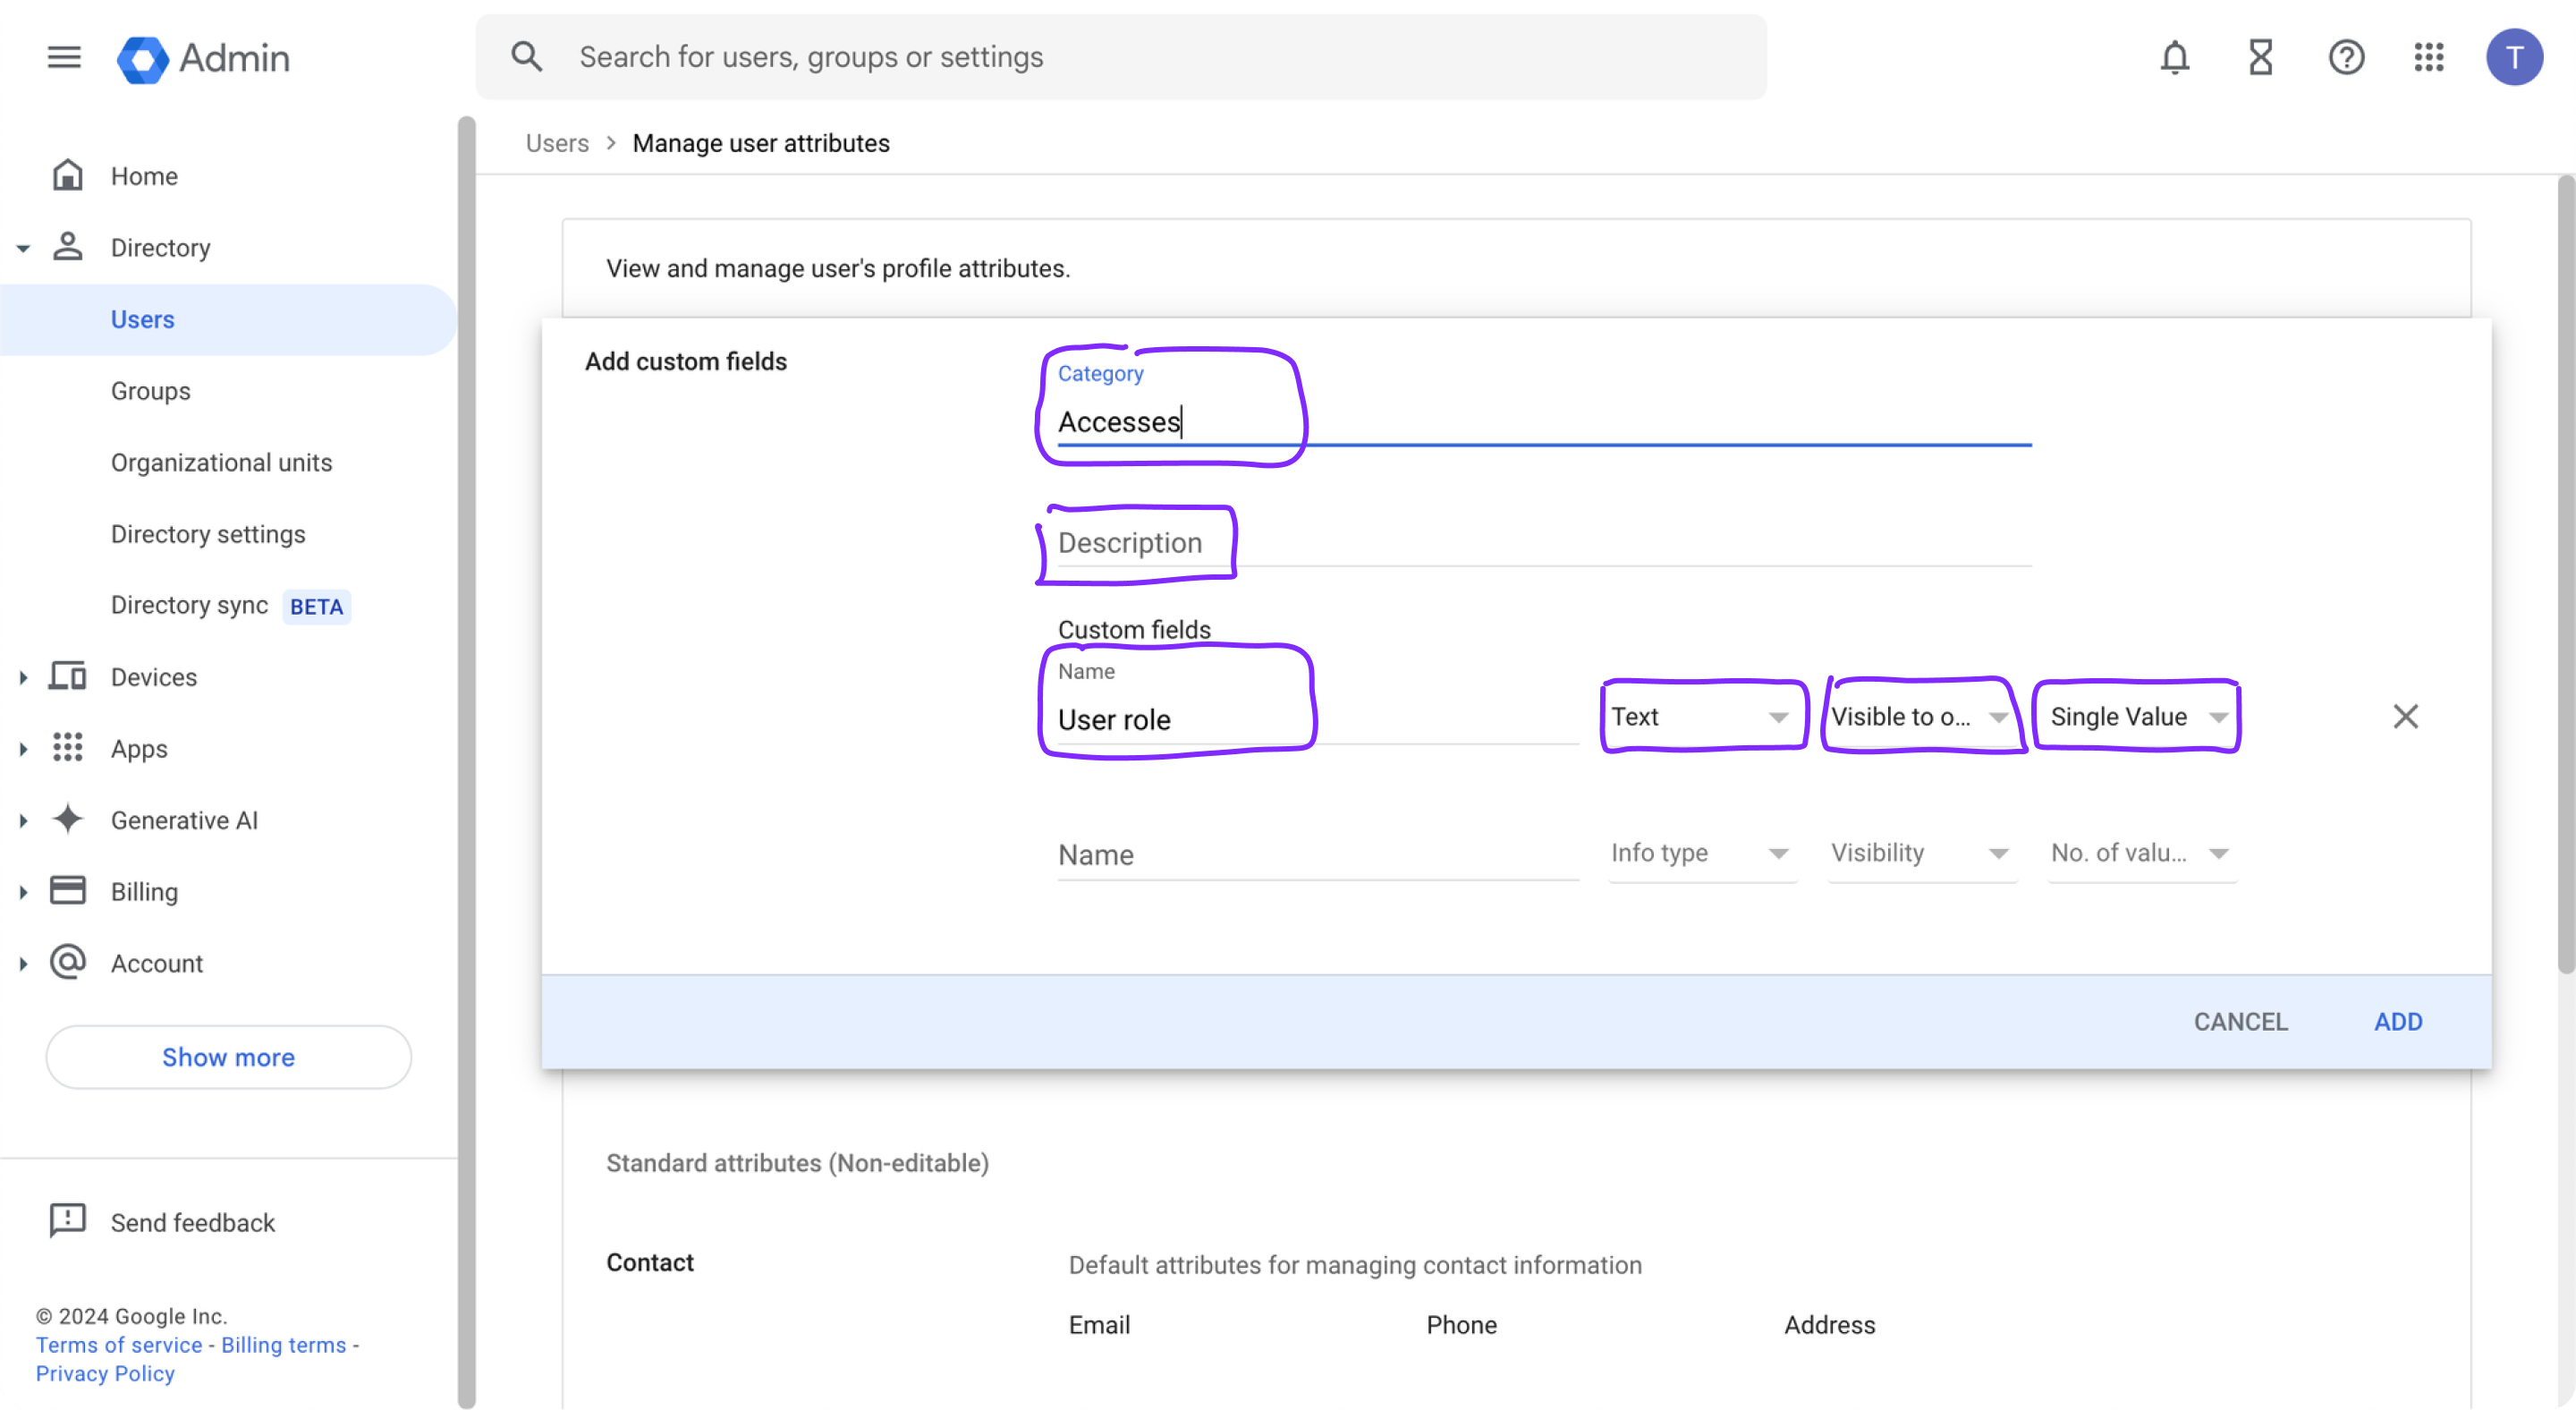
Enter the following details:
- Category: [Your Custom Value]
- Description: [Your Custom Value]
- Name:User role
- Info type:Text
- Visibility:Visible for organization
- Number of values:Single Value
Assign roles to individual users
Go to Directory > Users and select a user.
Go to User details > User information.
Find the custom field you created and click the edit icon next to it.
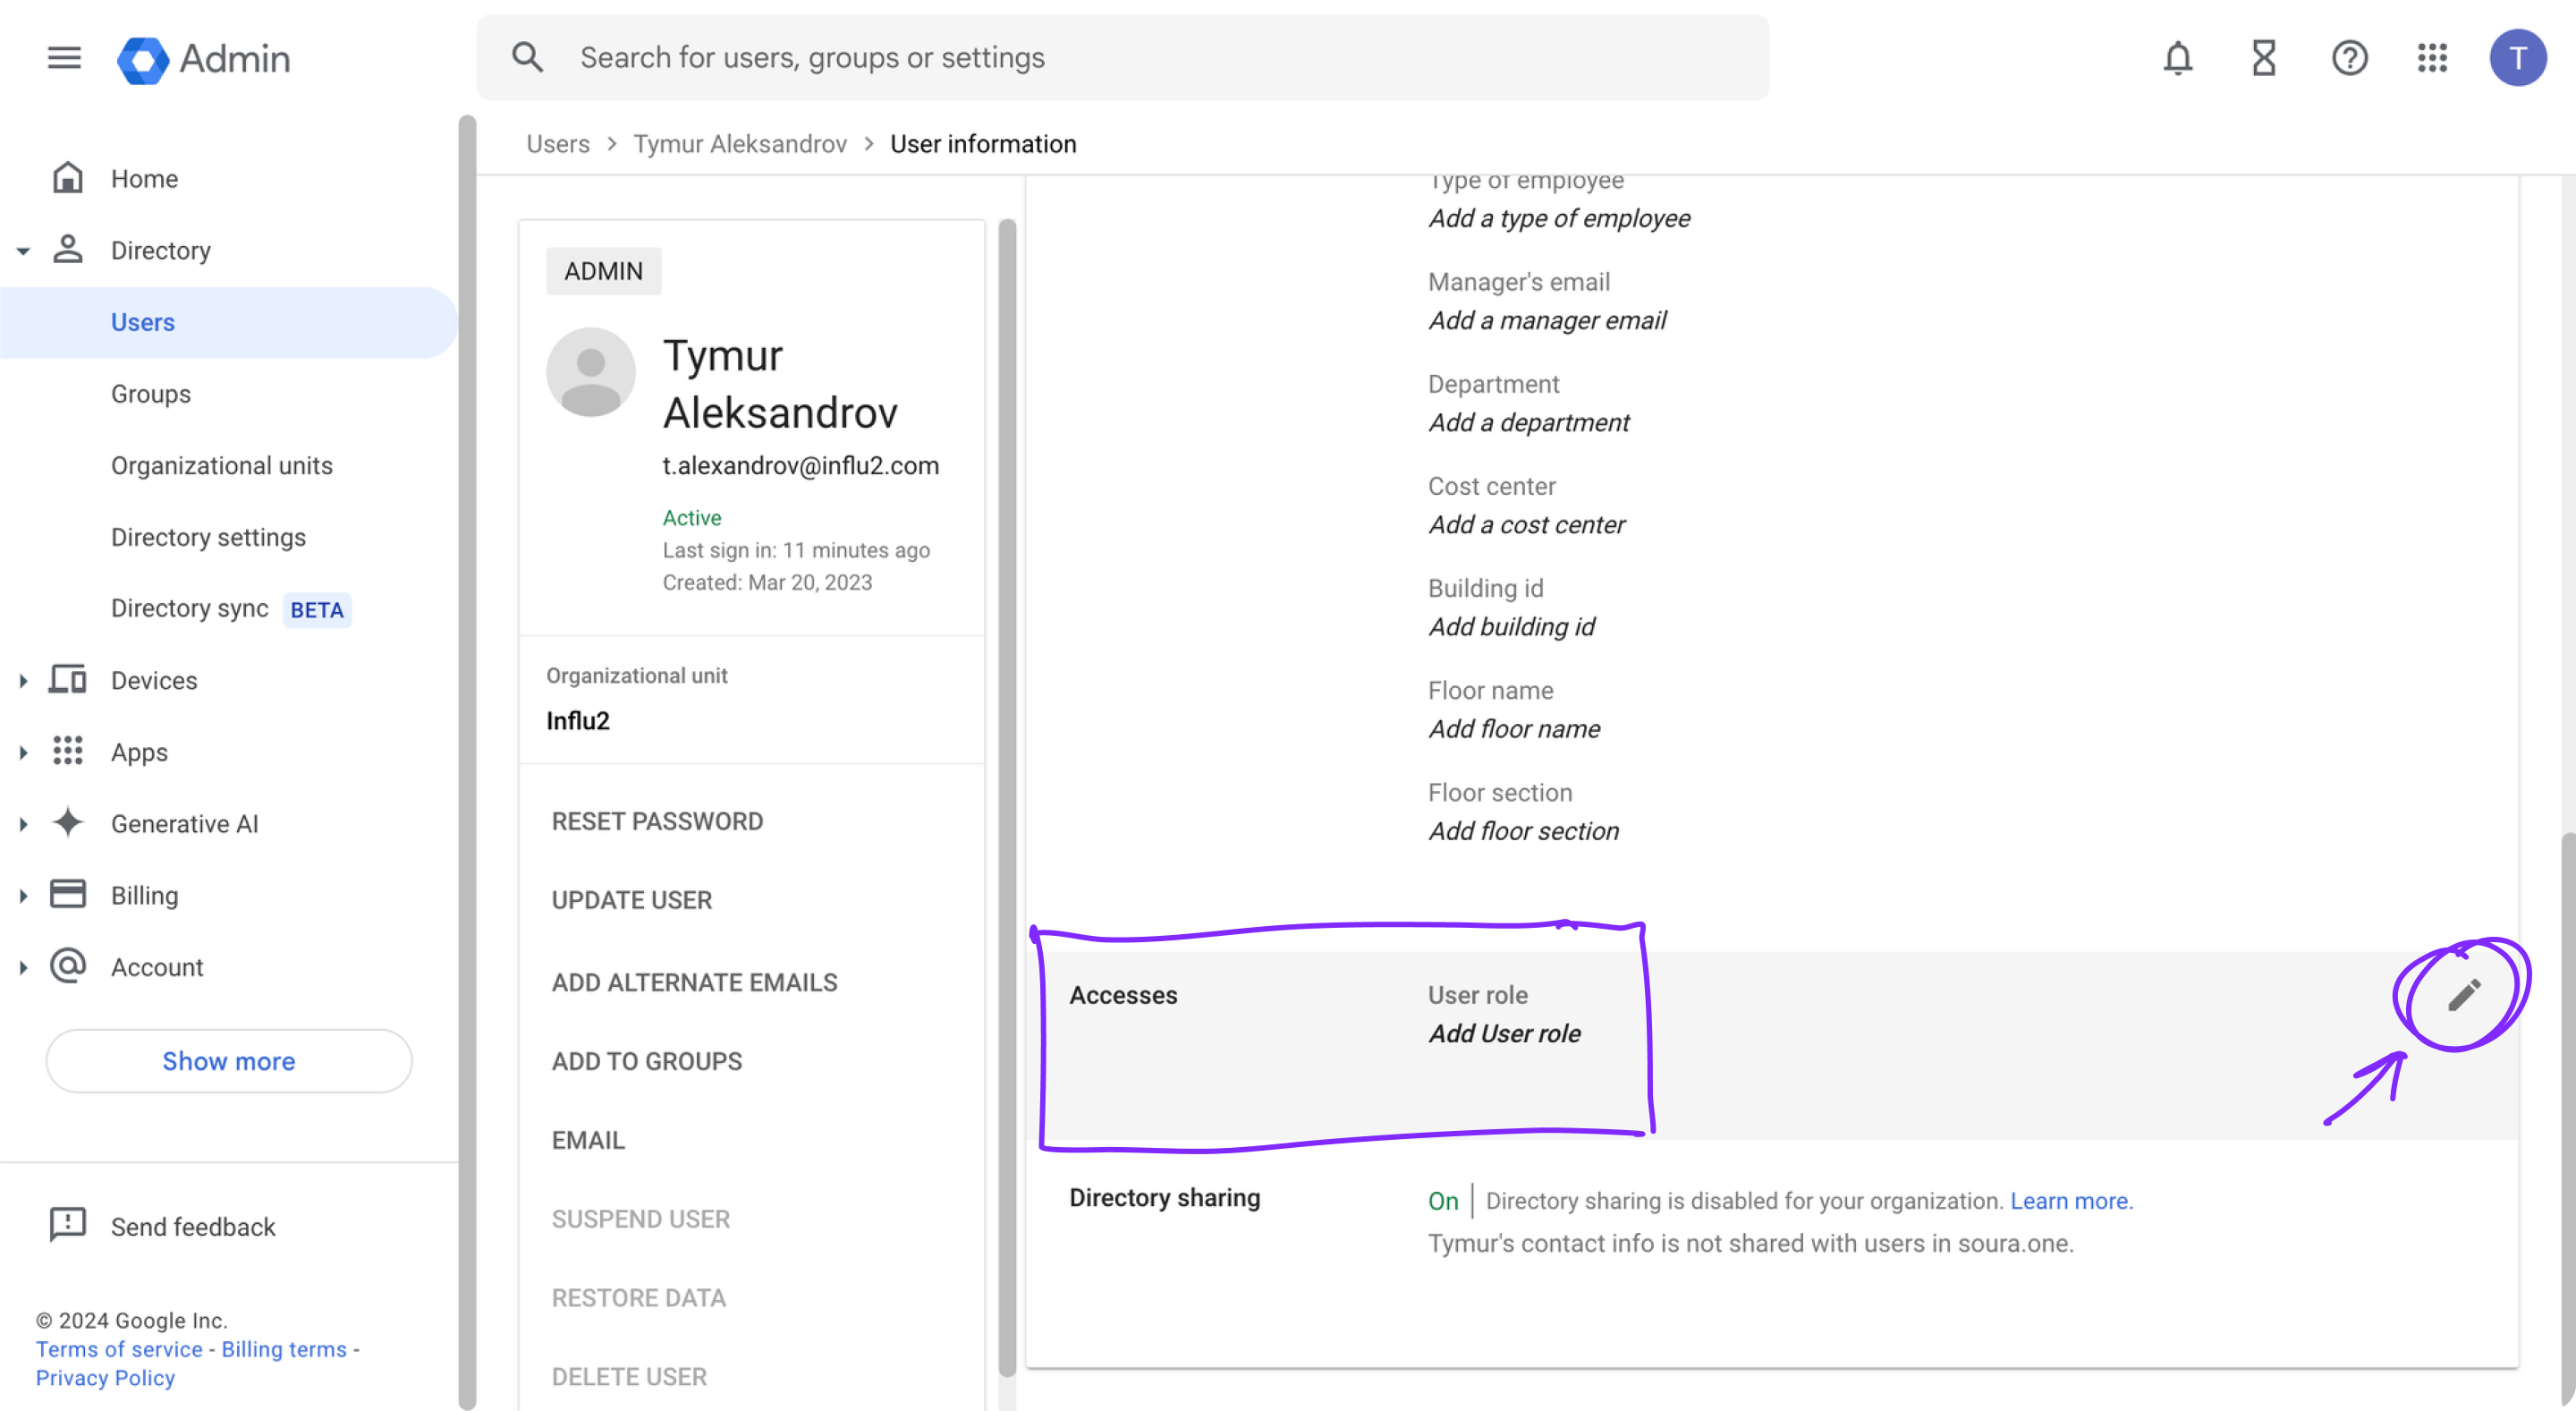
Enter the appropriate role:
-Admin— manages everything in Influ2 dashboard
-Manager— can launch campaigns but has no access to users and billing
-Viewer— has access to reporting data onlyClick Save.

Add the custom attribute to the SAML token
Go to Apps > Web and mobile apps.
Select your Influ2 application.
Expand the SAML attribute mapping section and click Add mapping.

In App attributes, select Role and pair it with
userRole.Click Save.

Finalize the Influ2 integration
Provide the following information to your Influ2 Customer Success Manager:
entity_id (typically
Influ2)idp_metadata in XML format
Once Influ2 receives this information and completes their setup, your team can log in with Google Workspace credentials.
What's next
Your team can now access Influ2 using their Google Workspace login. Roles you assigned in Google Workspace will automatically apply when users log in to Influ2.