How to set up single sign-on (SSO) with Okta
Last updated: April 20, 2026
Setting up SSO with Okta for your Influ2 account gives your team a secure, unified way to sign in. Instead of managing separate passwords, your team uses their Okta credentials—eliminating friction and reducing security risks.
This walkthrough takes you through five key steps.
Before you start
You'll need admin access to both your Okta dashboard and your Influ2 account.
Steps
1. Create a new application in Okta
Open your Okta dashboard and go to Applications.
Click Create App Integration.
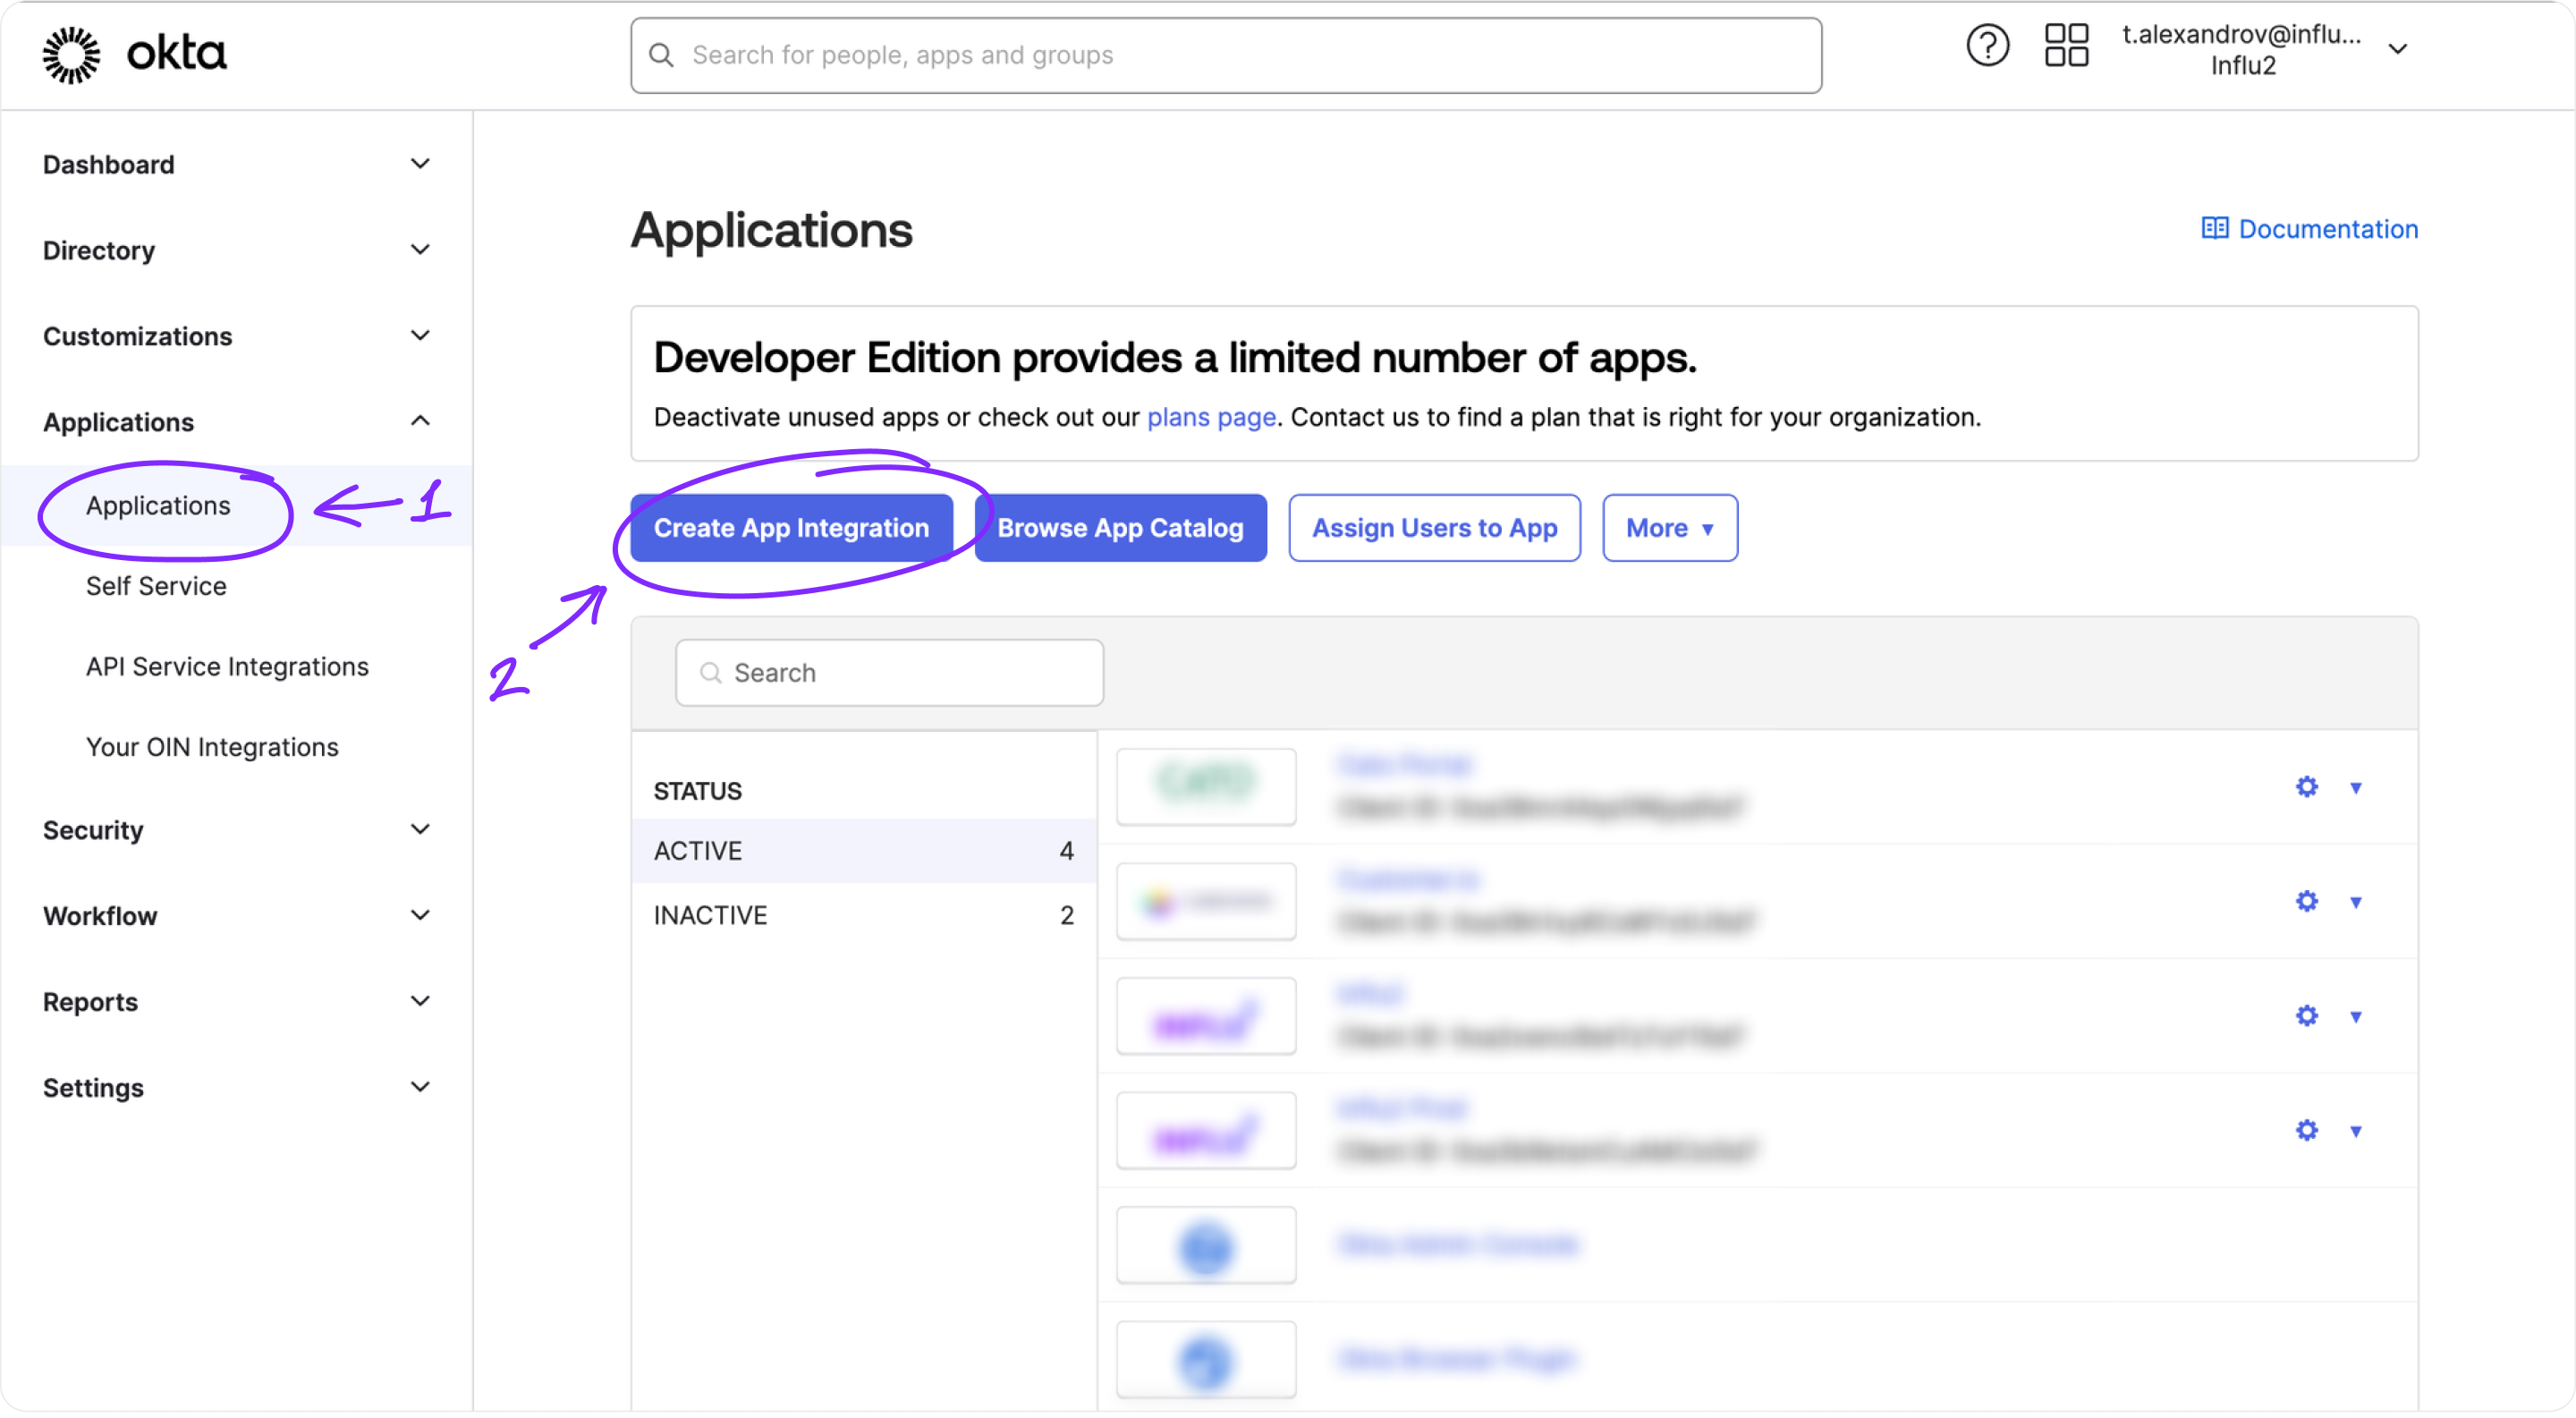
Select OIDC - OpenID Connect as the sign-in method.
Choose Web Application as the application type.
Click Next.

2. Configure the application parameters
Give your Influ2 application a descriptive name (e.g., "Influ2 SSO").
Set the Sign-in redirect URI to:
https://v2.influ2.com/v1/api/auth/callback/oktaSet the Sign-out redirect URI to:
https://v2.influ2.com/loginClick Save.

3. Create a user attribute for roles
Okta will auto-generate a user profile when you create the app. Now you'll add a custom attribute so Influ2 knows what role to assign each user.
Go to Directory > Profile Editor.
Find the profile that Okta created for your app (it'll be named something like "Influ2 SSO User"). Click it.
Click Add Attribute.
Fill in the following:
- Data Type: String
- Display Name: UserRole (or any name your team recognizes)
- Variable Name: user_role
- Enum: Active
- Attribute Members: Add these three roles:admin
manager
viewer
Attribute Type: Personal
Click Save.


4. Assign users and roles to the application
Go to Applications > Applications and find your Influ2 app.
Open the Assignments tab and click Assign.
Choose the users or groups you want to give access to Influ2.
For each user, assign the appropriate Influ2 role: admin, manager, or viewer.

Keep in mind: If you don't assign a role to a user, Influ2 will treat them as an admin by default. To avoid unintended permissions, assign a specific role to everyone.

5. Share integration details with Influ2
Once you've finished configuring Okta, gather these three pieces of information and share them with your Influ2 Customer Success Manager or Implementation Manager:
Your Okta Org URL (from your Okta dashboard)
Client ID for your Influ2 application
Client Secret for your Influ2 application
Influ2 will handle the final configuration on our end. Once complete, your team can sign in using their Okta credentials.
What you'll see
After SSO is live, your team will see an Okta sign-in option on the Influ2 login page. Clicking it will redirect them to Okta to authenticate, then bring them straight into Influ2 with the role you assigned.