How to manually add audience members to a cohort via file upload
Last updated: April 29, 2026
You can add contacts to a cohort in two ways: sync from your CRM based on criteria, or upload a spreadsheet with specific contacts. This guide covers the upload option.
Before you start
File upload capability must be enabled on your account. Contact your Customer Success Manager to activate this feature if you haven't already.
Your spreadsheet should be in CSV, XLS, or XLSX format with 3 to 100,000 rows.
Steps to upload an audience
Log in to Influ2 and go to Programs.
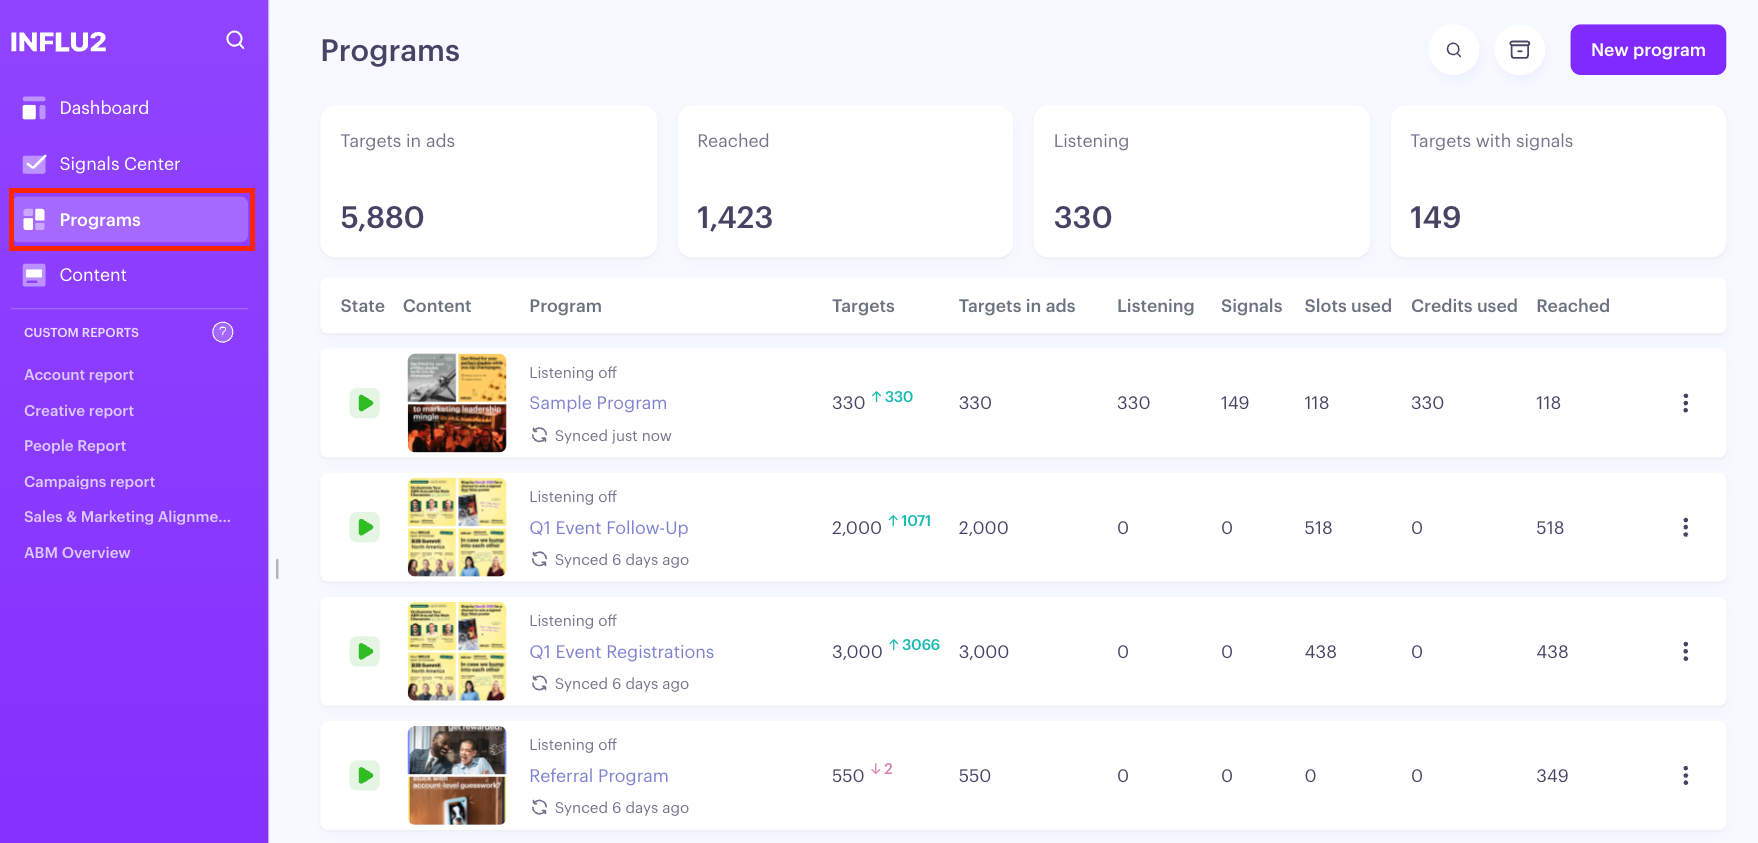
Select the program you're uploading the audience for, and click the Cohort tab.
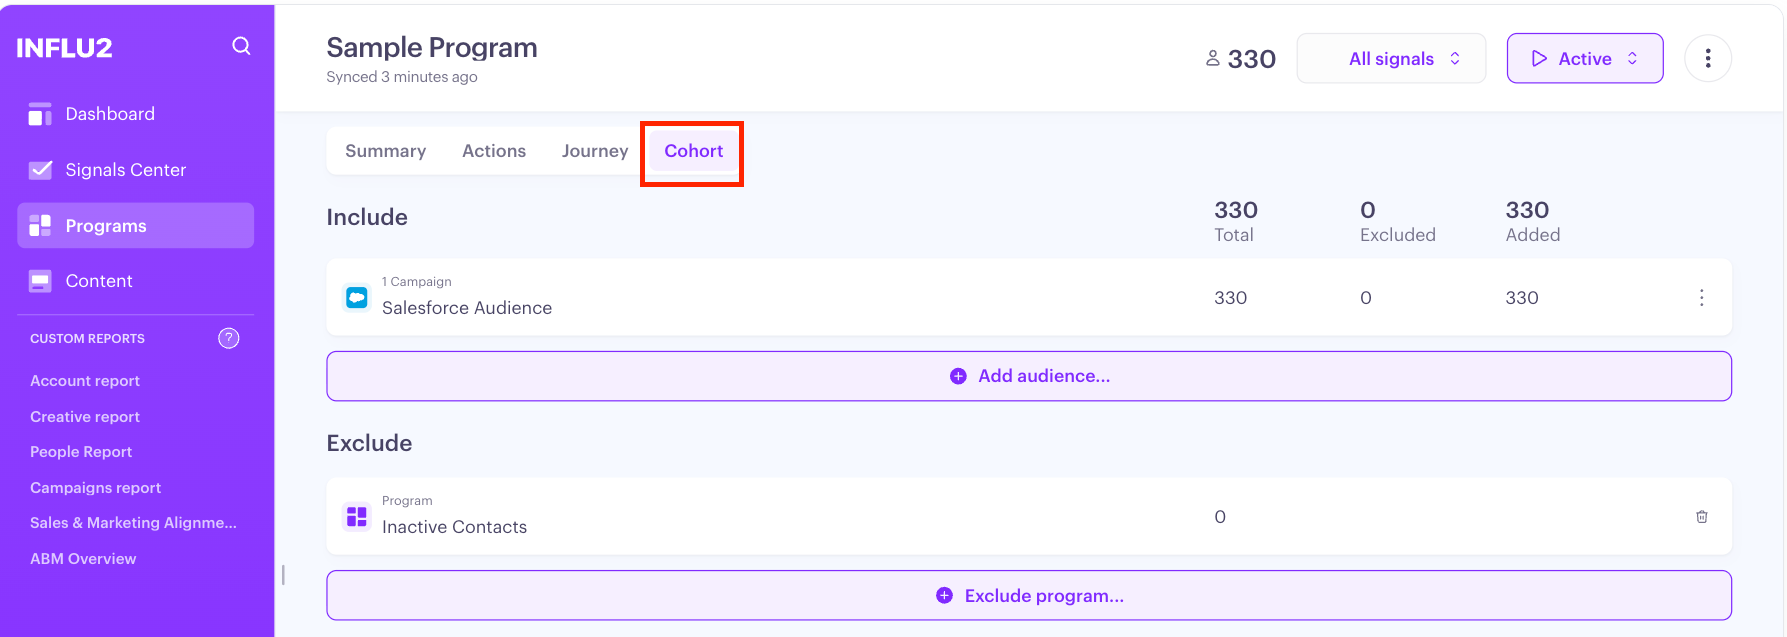
Click Add audience and select import.

If you're adding to an existing audience, click the three dots menu and select Edit.

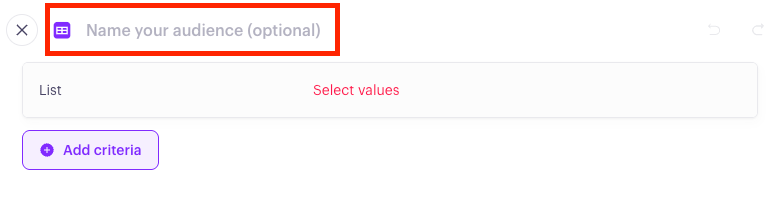
Name your audience (optional), then click Select Values > Upload Audience
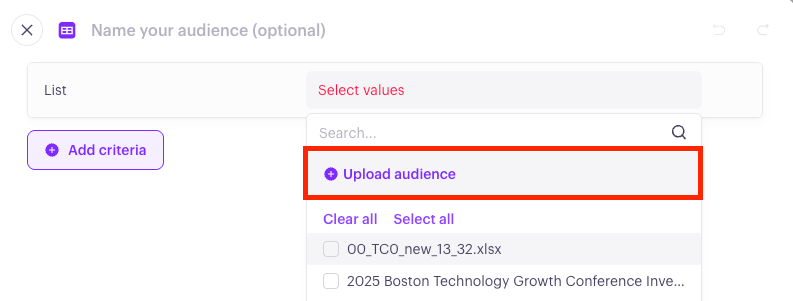
Upload your file or browse to select it from your device.
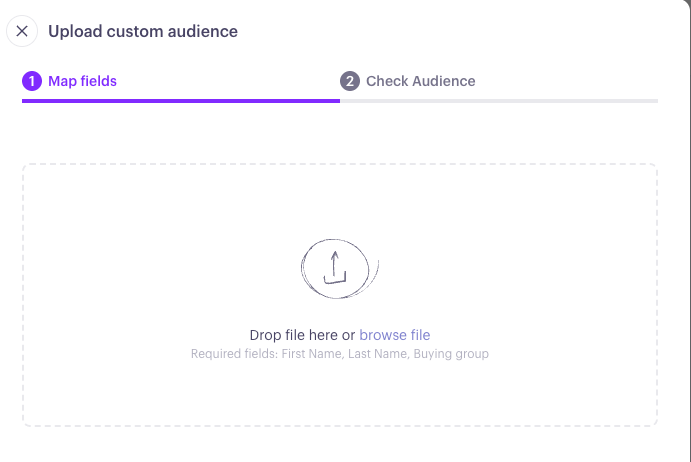
Keep in mind:
Required fields: First Name, Last Name, Buying Group
Recommended: Include an External Target ID (like your CRM ID) to prevent duplicates and enable easier updates
Optional system columns: Owner name, Owner email, External Contact ID, External Account ID
Custom columns: You can add any custom columns — they'll become available as segmentation criteria later
Map your file columns to Influ2 fields.
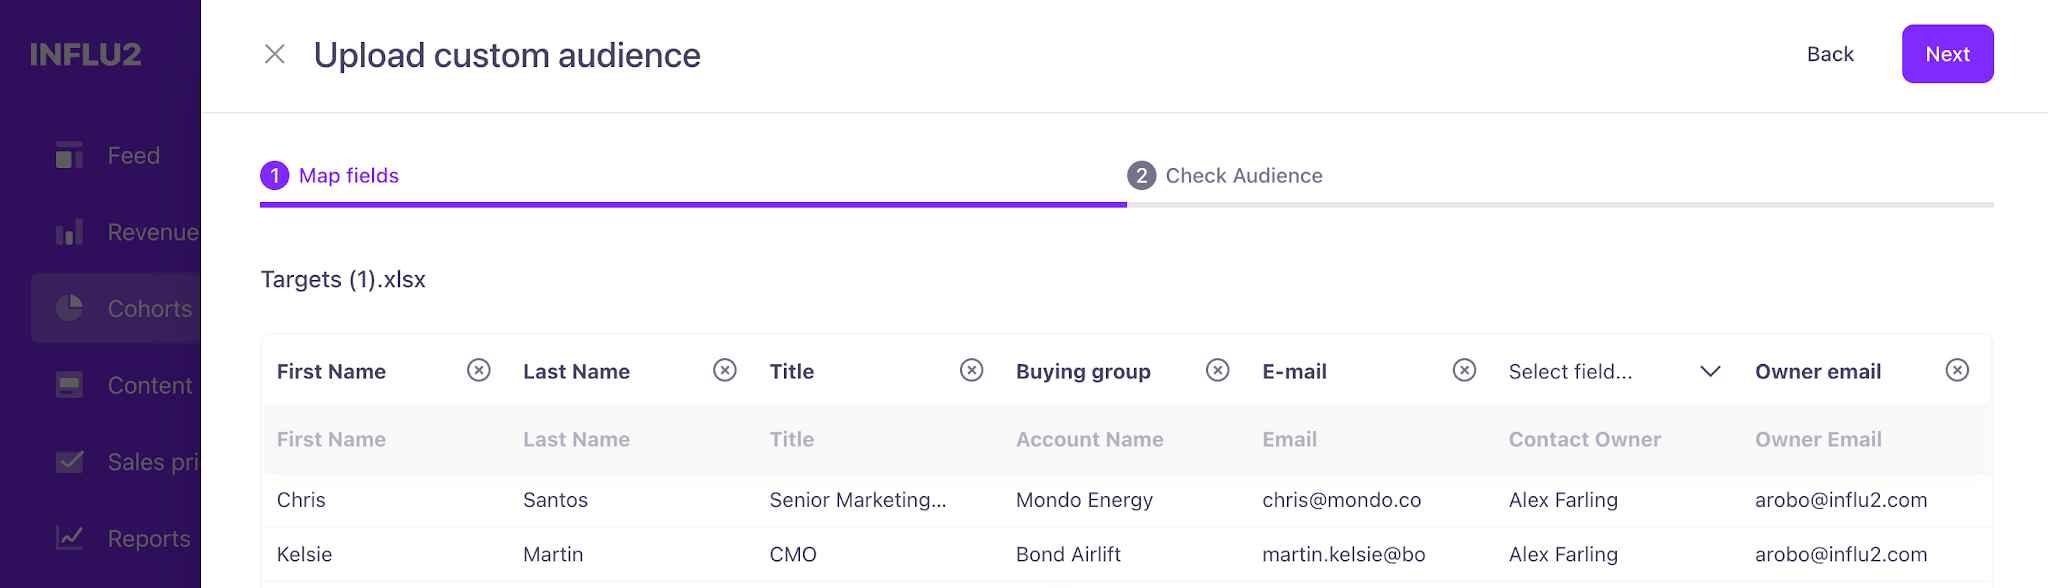
Influ2 recognizes standard headers like "First name," "Last name," and "Company." For custom columns, create new segmentation criteria by clicking Create new criteria.
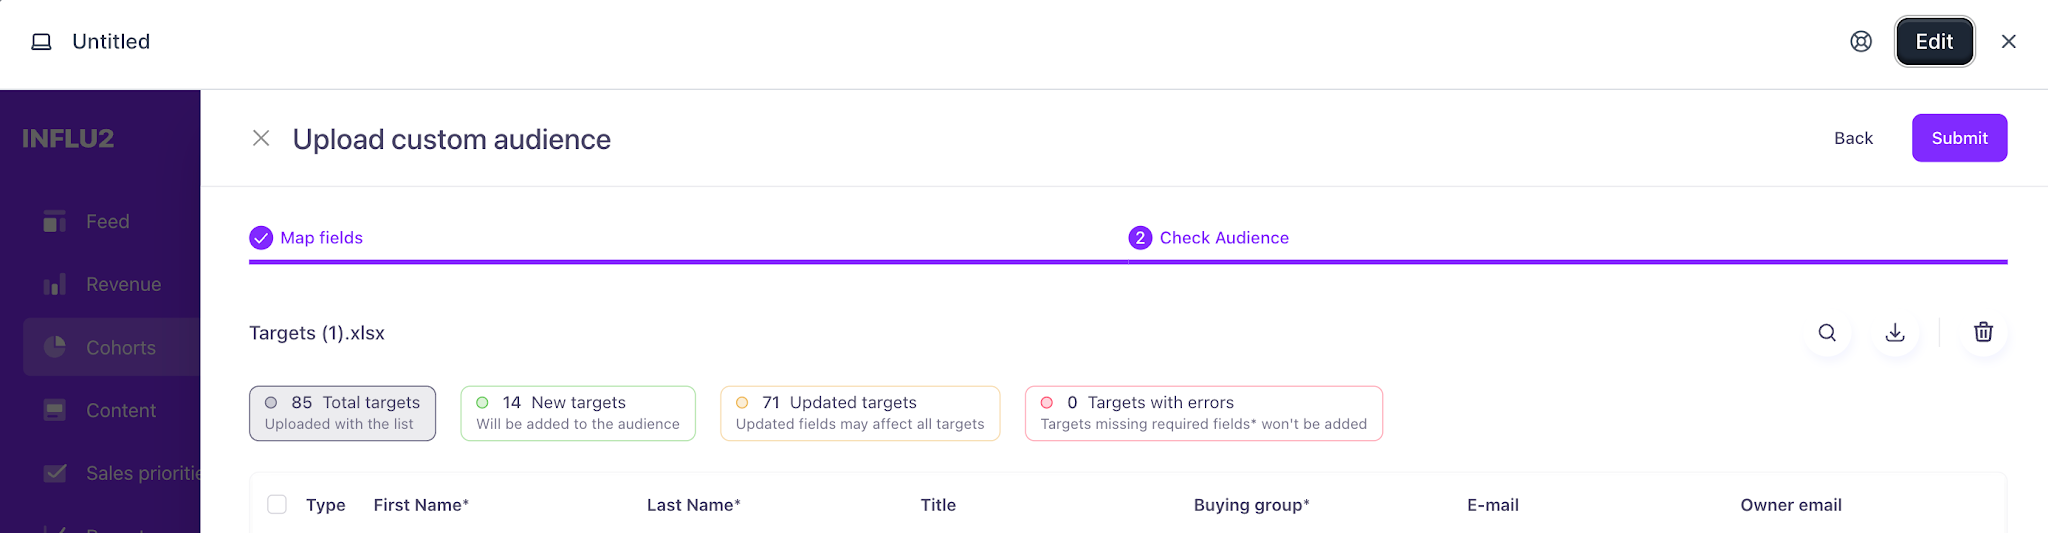
Review your file before submitting.
You'll see summaries for:
Total count — total rows in your file
New targets — contacts being added for the first time
Updated targets — existing contacts with changed data
Errors — contacts with missing required fields
Search for specific targets (2+ characters) and delete any via checkbox if needed.
Click Submit to finalize your audience.
Understand target statuses
After upload, targets are assigned statuses:
New — First-time imports; previously didn't exist in Influ2
Updated — Existing contacts whose data changed in system default columns. Click Update history to see what changed.
Error — Contacts with missing or invalid required fields. These won't be included in your cohort.
File requirements and validation
Your file must meet these specs:
Format: CSV, XLS, or XLSX
Minimum columns: 3
Maximum rows: 100,000
Common validation errors:
File exceeds 100,000 rows — System shows an error about the row limit
File is empty — System displays an empty file message
Fewer than 3 columns — System shows a minimum columns error
Incorrect file format — System displays a format or size error
Mandatory fields are empty — Fields are marked "Cannot be empty" with red highlighting
Duplicate records — System detects and removes duplicates after submit; only unique values are saved
Reuse previous uploads
Once your audience is imported, the segment displays the file name and target count. You can close the segment or import a new audience. Previously imported audiences are available from the dropdown to reuse them without re-uploading.