Creating a campaign within Influ2 can be done in just a few steps. Let's walk through how you can start your first campaign!
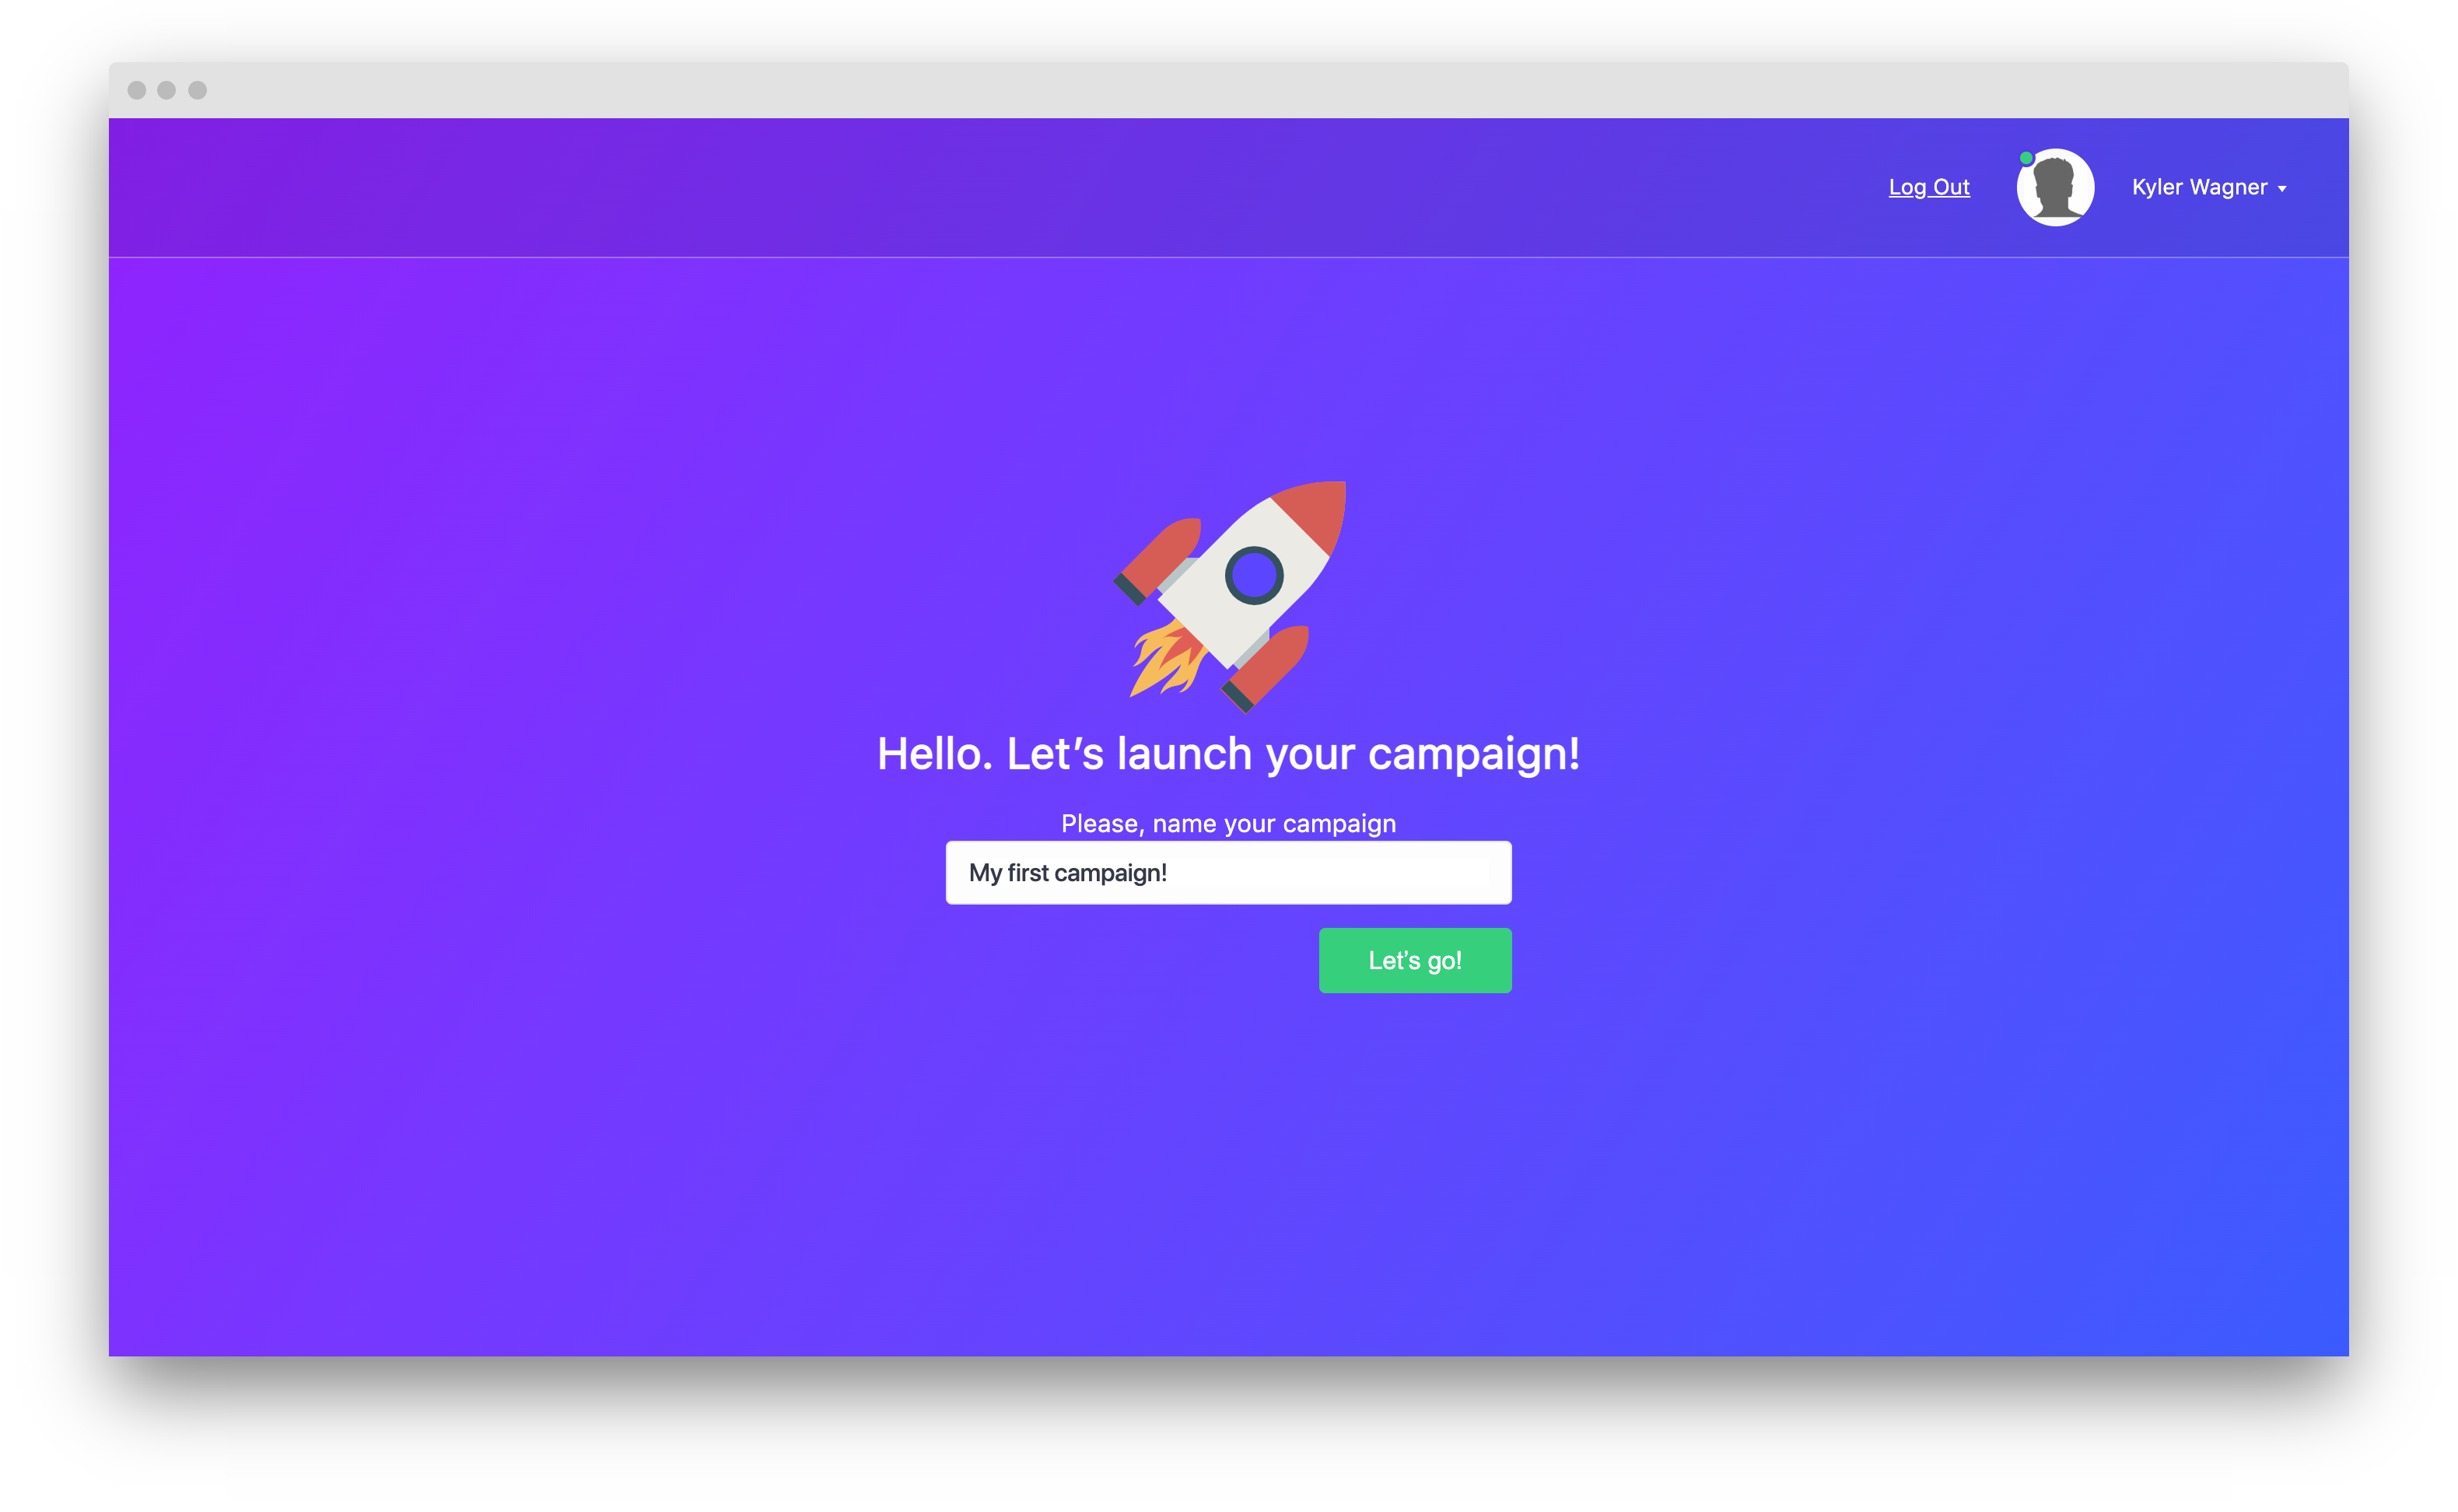
1. Go to the 'Campaigns' tab. Once there, click 'Create'.

2. Title your campaign, then click 'Let's go!'.
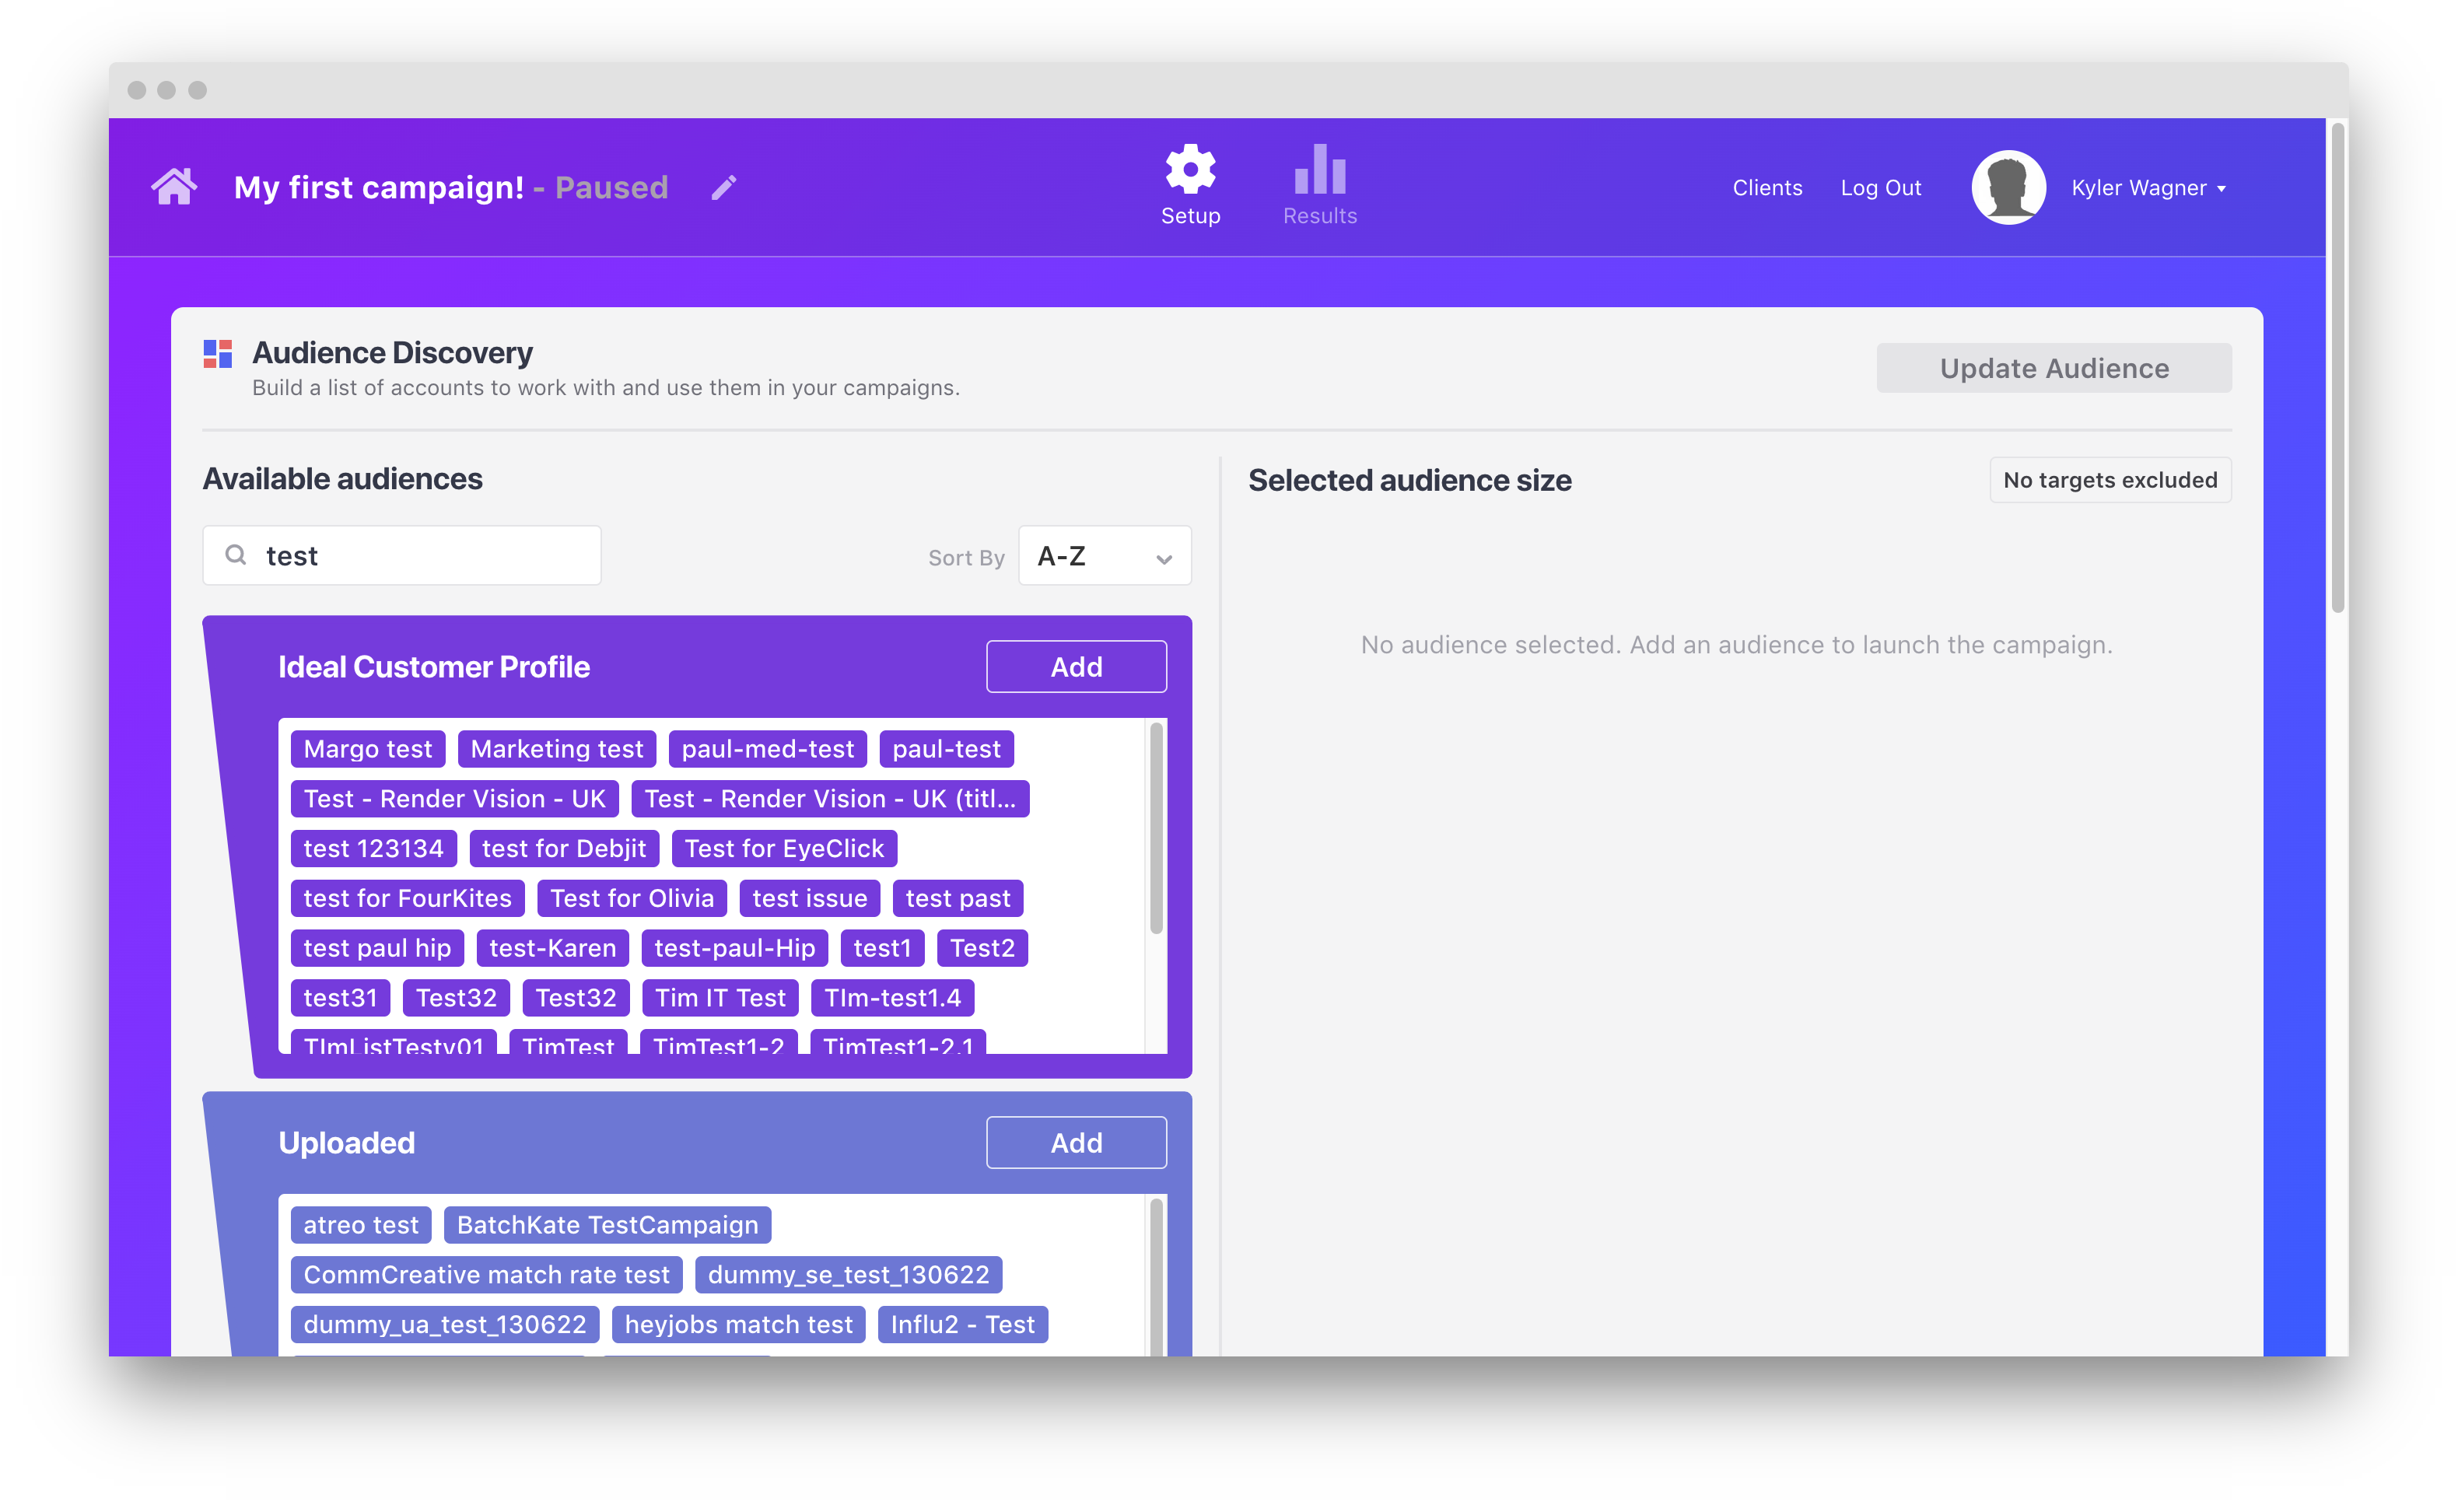
3. You'll be taken to the Audience Discovery tool. This tool has five modules to create, upload, and build lists to target with your campaign. To learn more about Audience Discovery, follow this user guide.
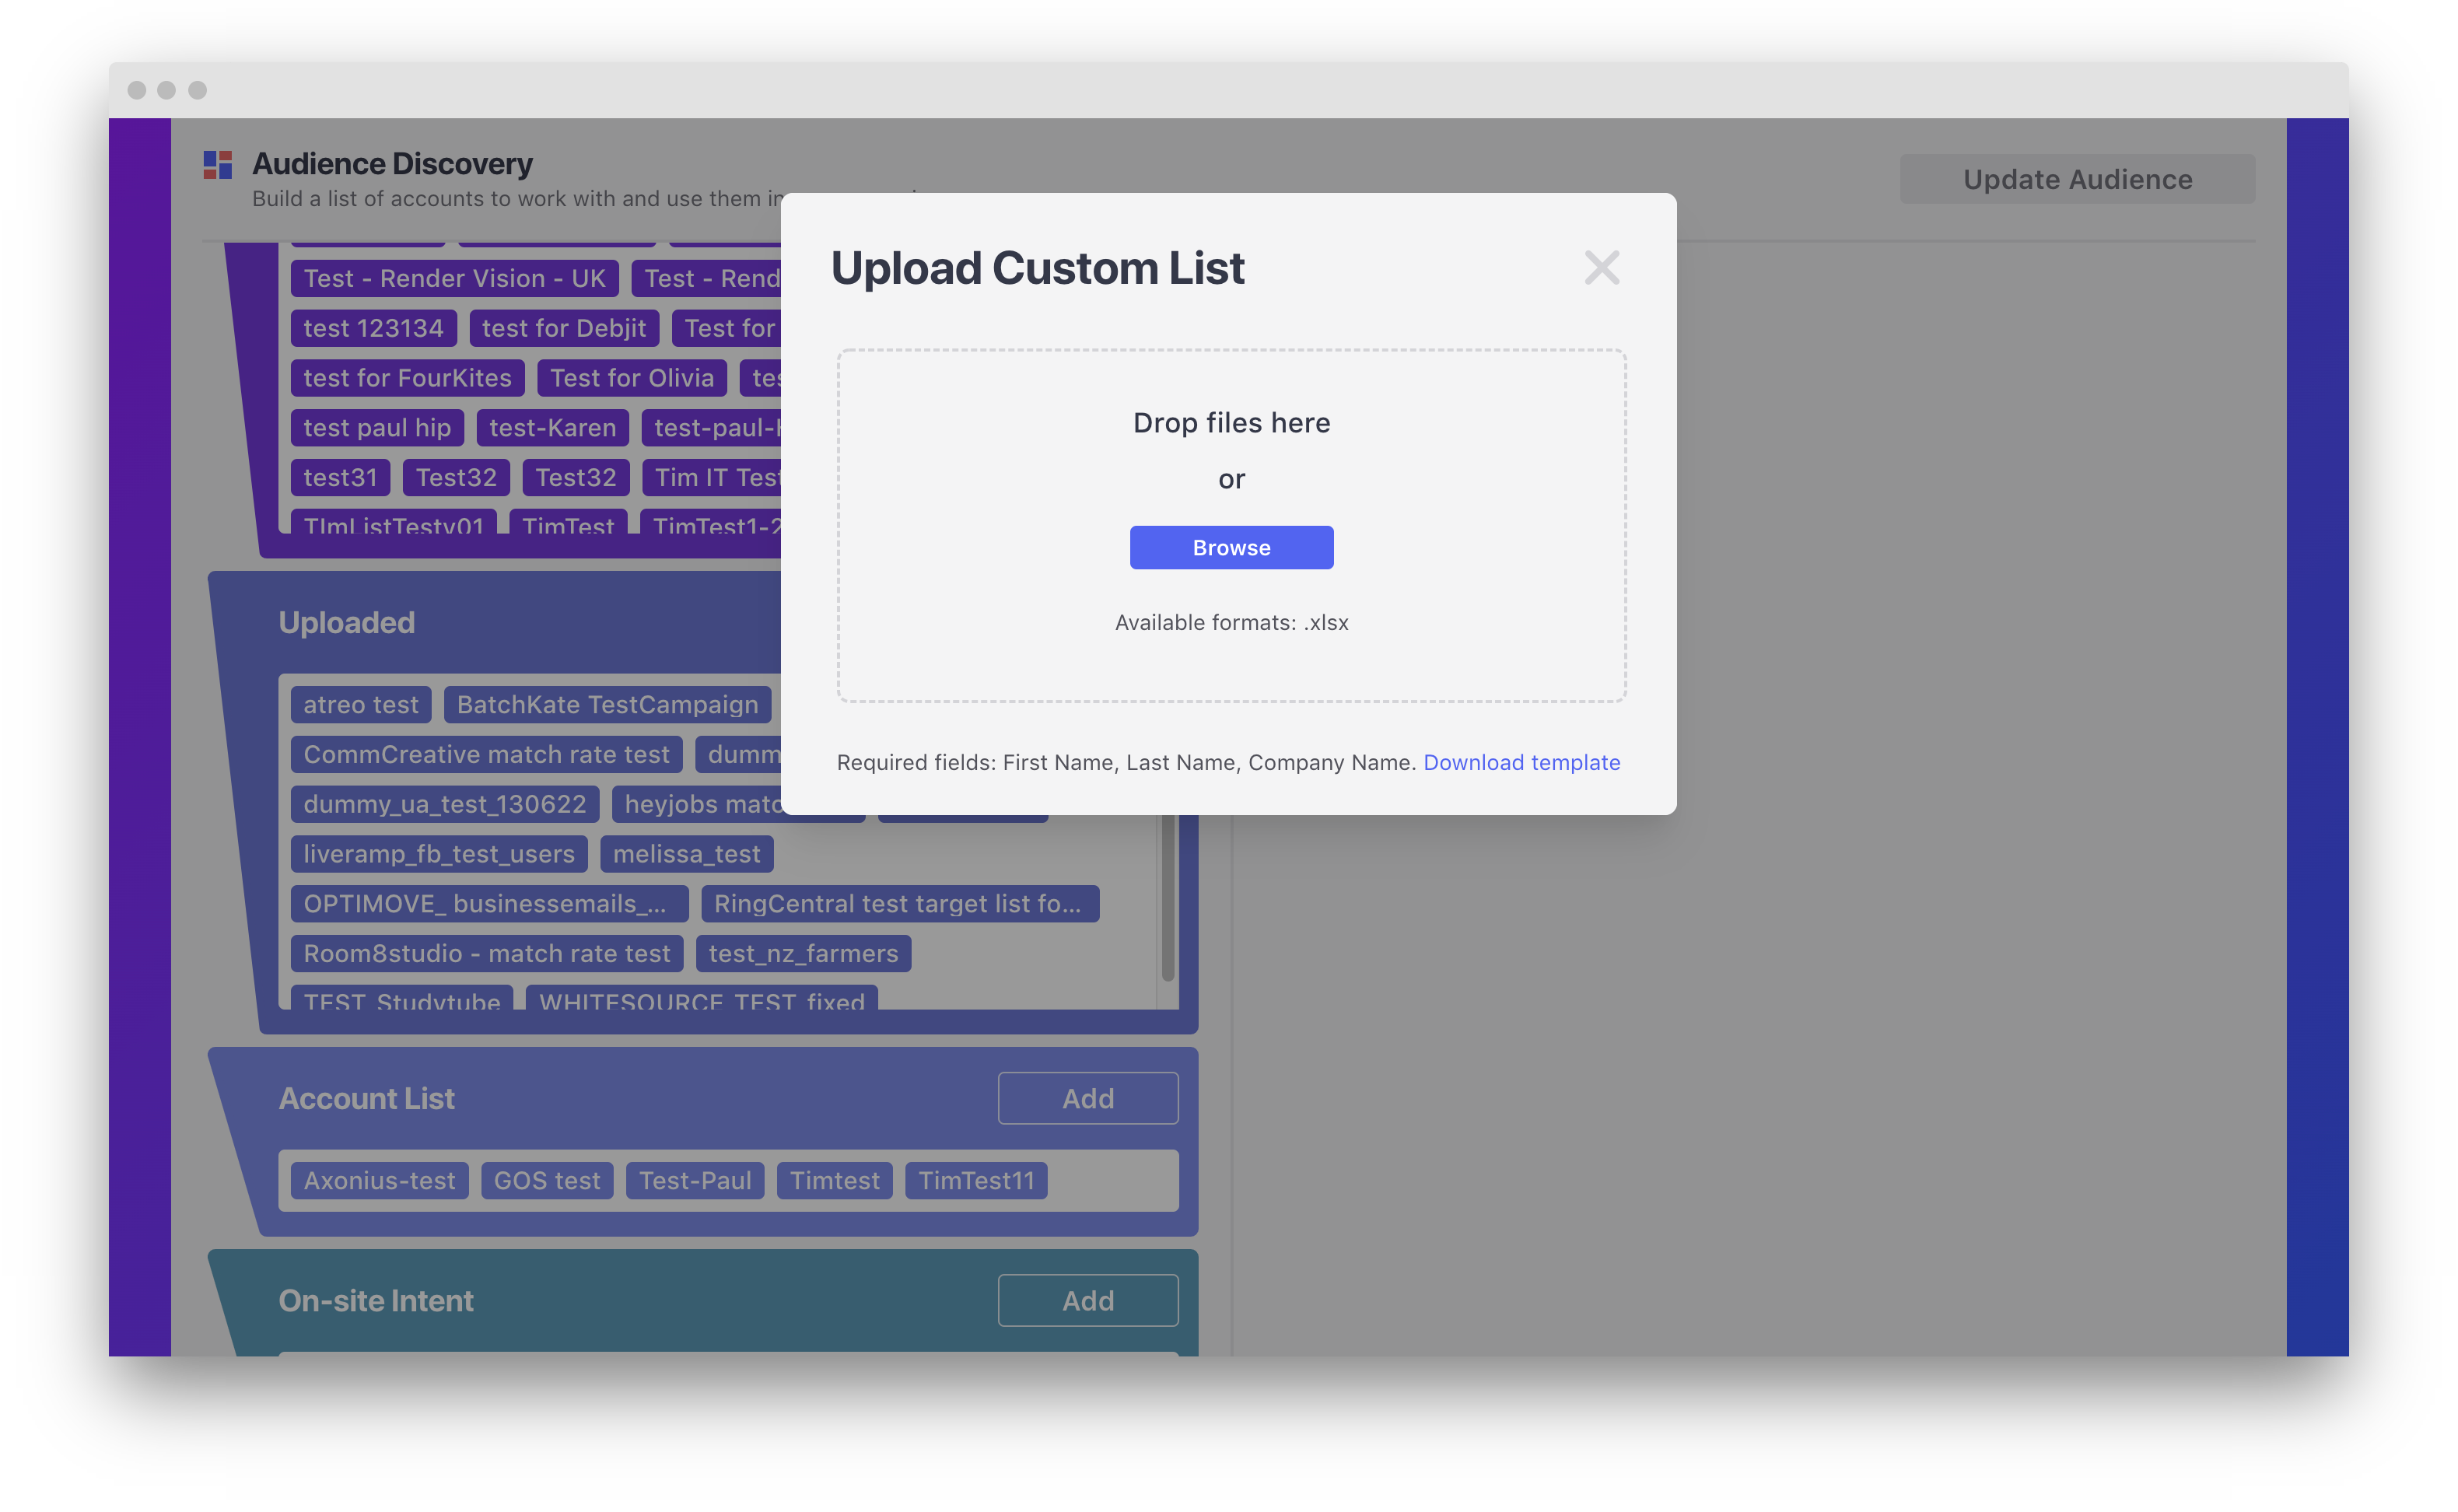
For this example, click 'Add' in the 'Uploaded' module. Then, upload an existing list of contacts you'd like to target with ads. Download the Influ2 template here.
 |
 |
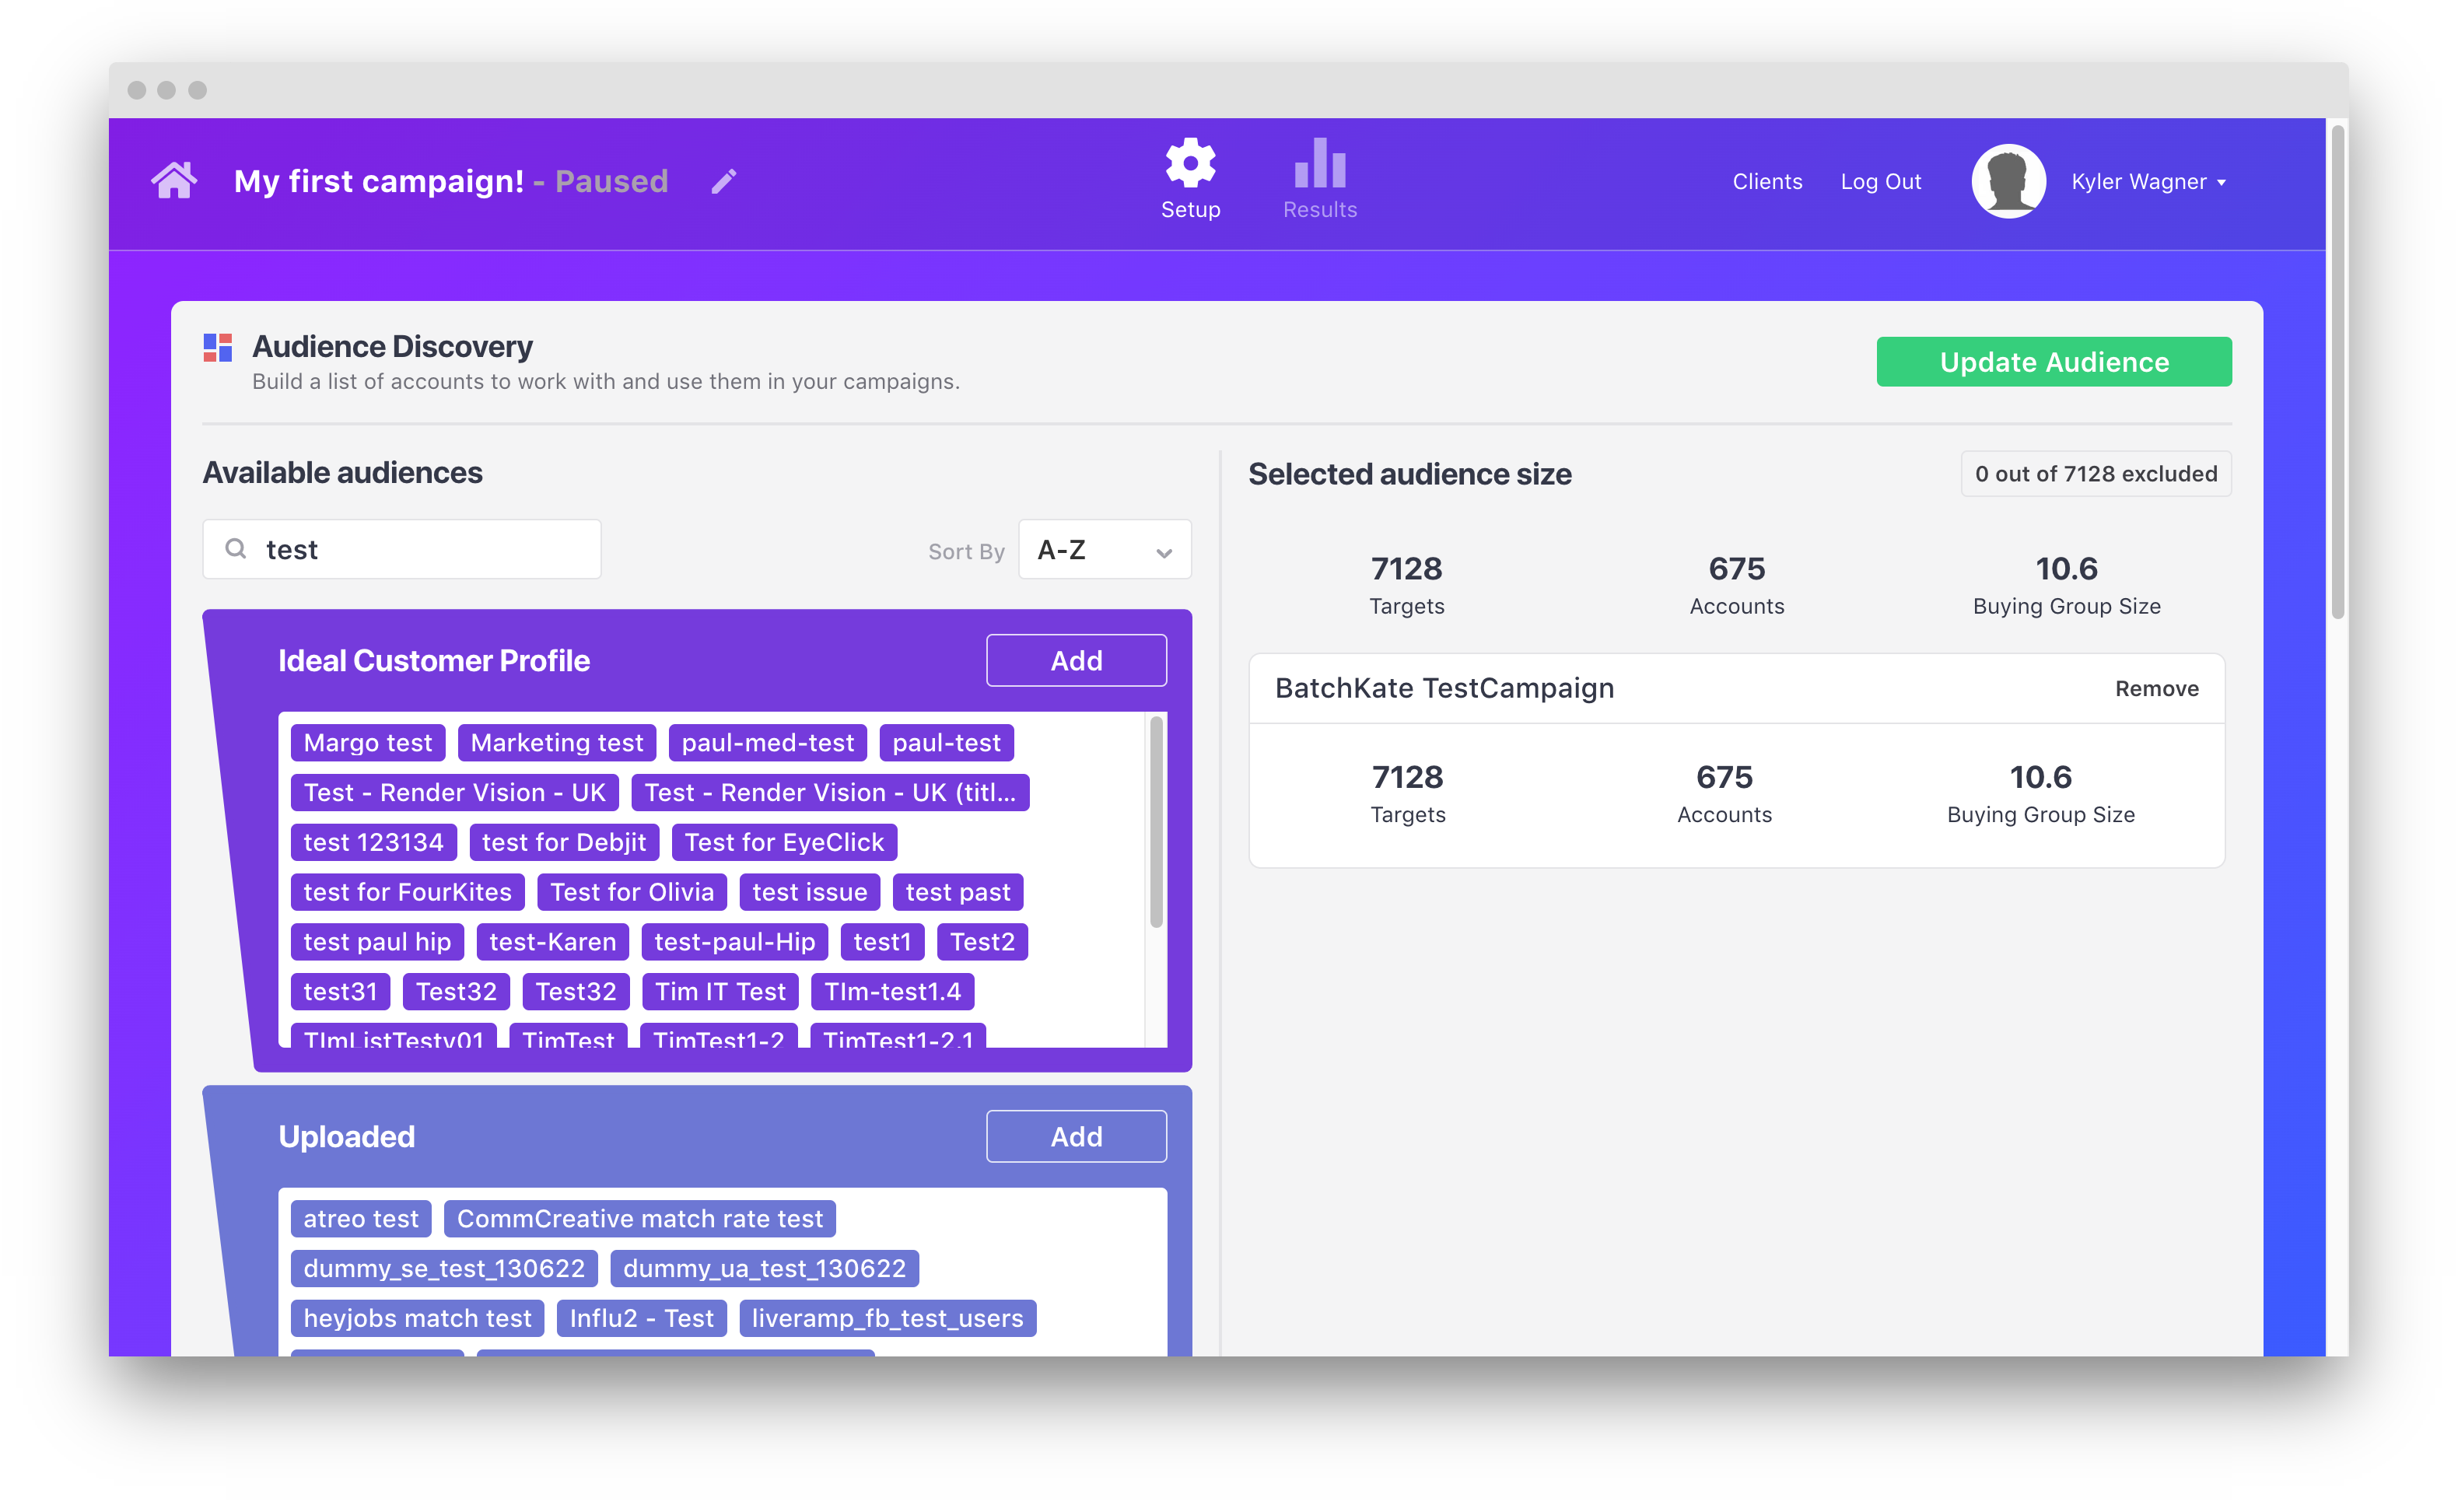
4. After adding every list you'd like to target in this campaign, you can view them in the 'Selected Audiences' section. Click 'Update Audience' to save the changes to this campaign before continuing.
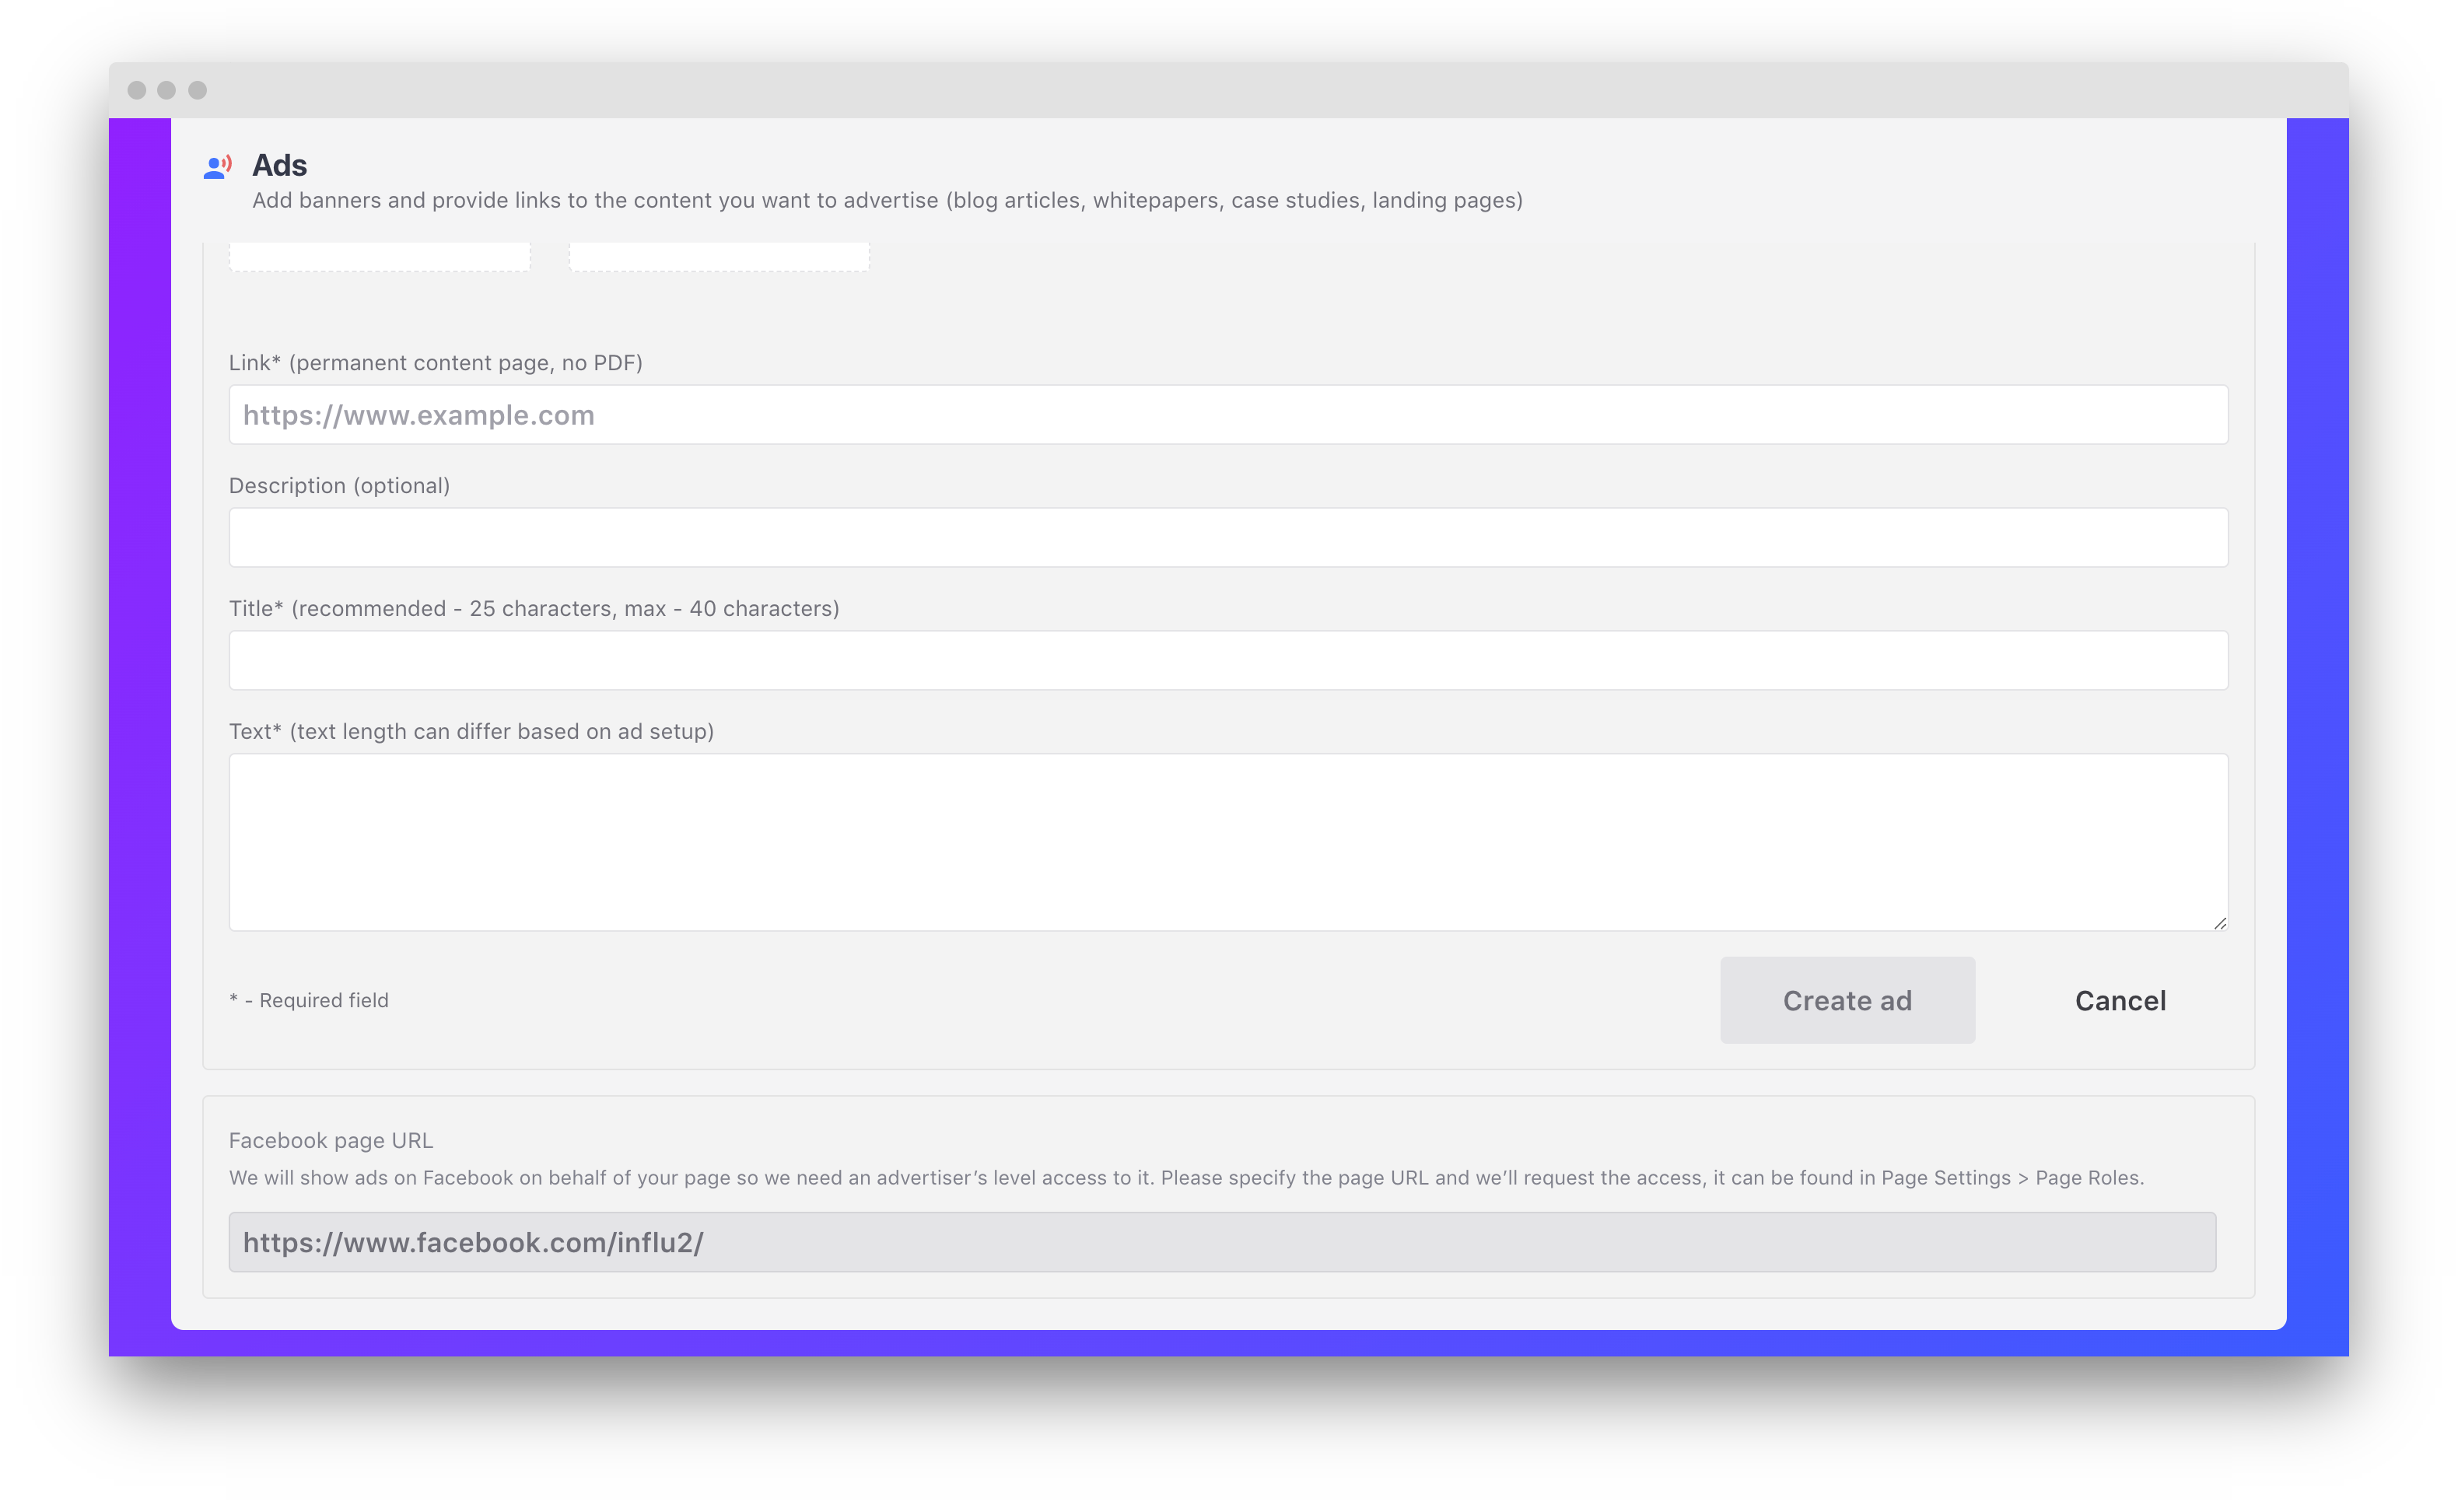
5. Scroll down and click 'Create an ad'. Once clicked, a new panel will display. In this panel, you can upload all your image and video creative. To see the best practices for developing your creative, follow this user guide. After uploading your files and entering relevant titles and links, click 'Create ad'.
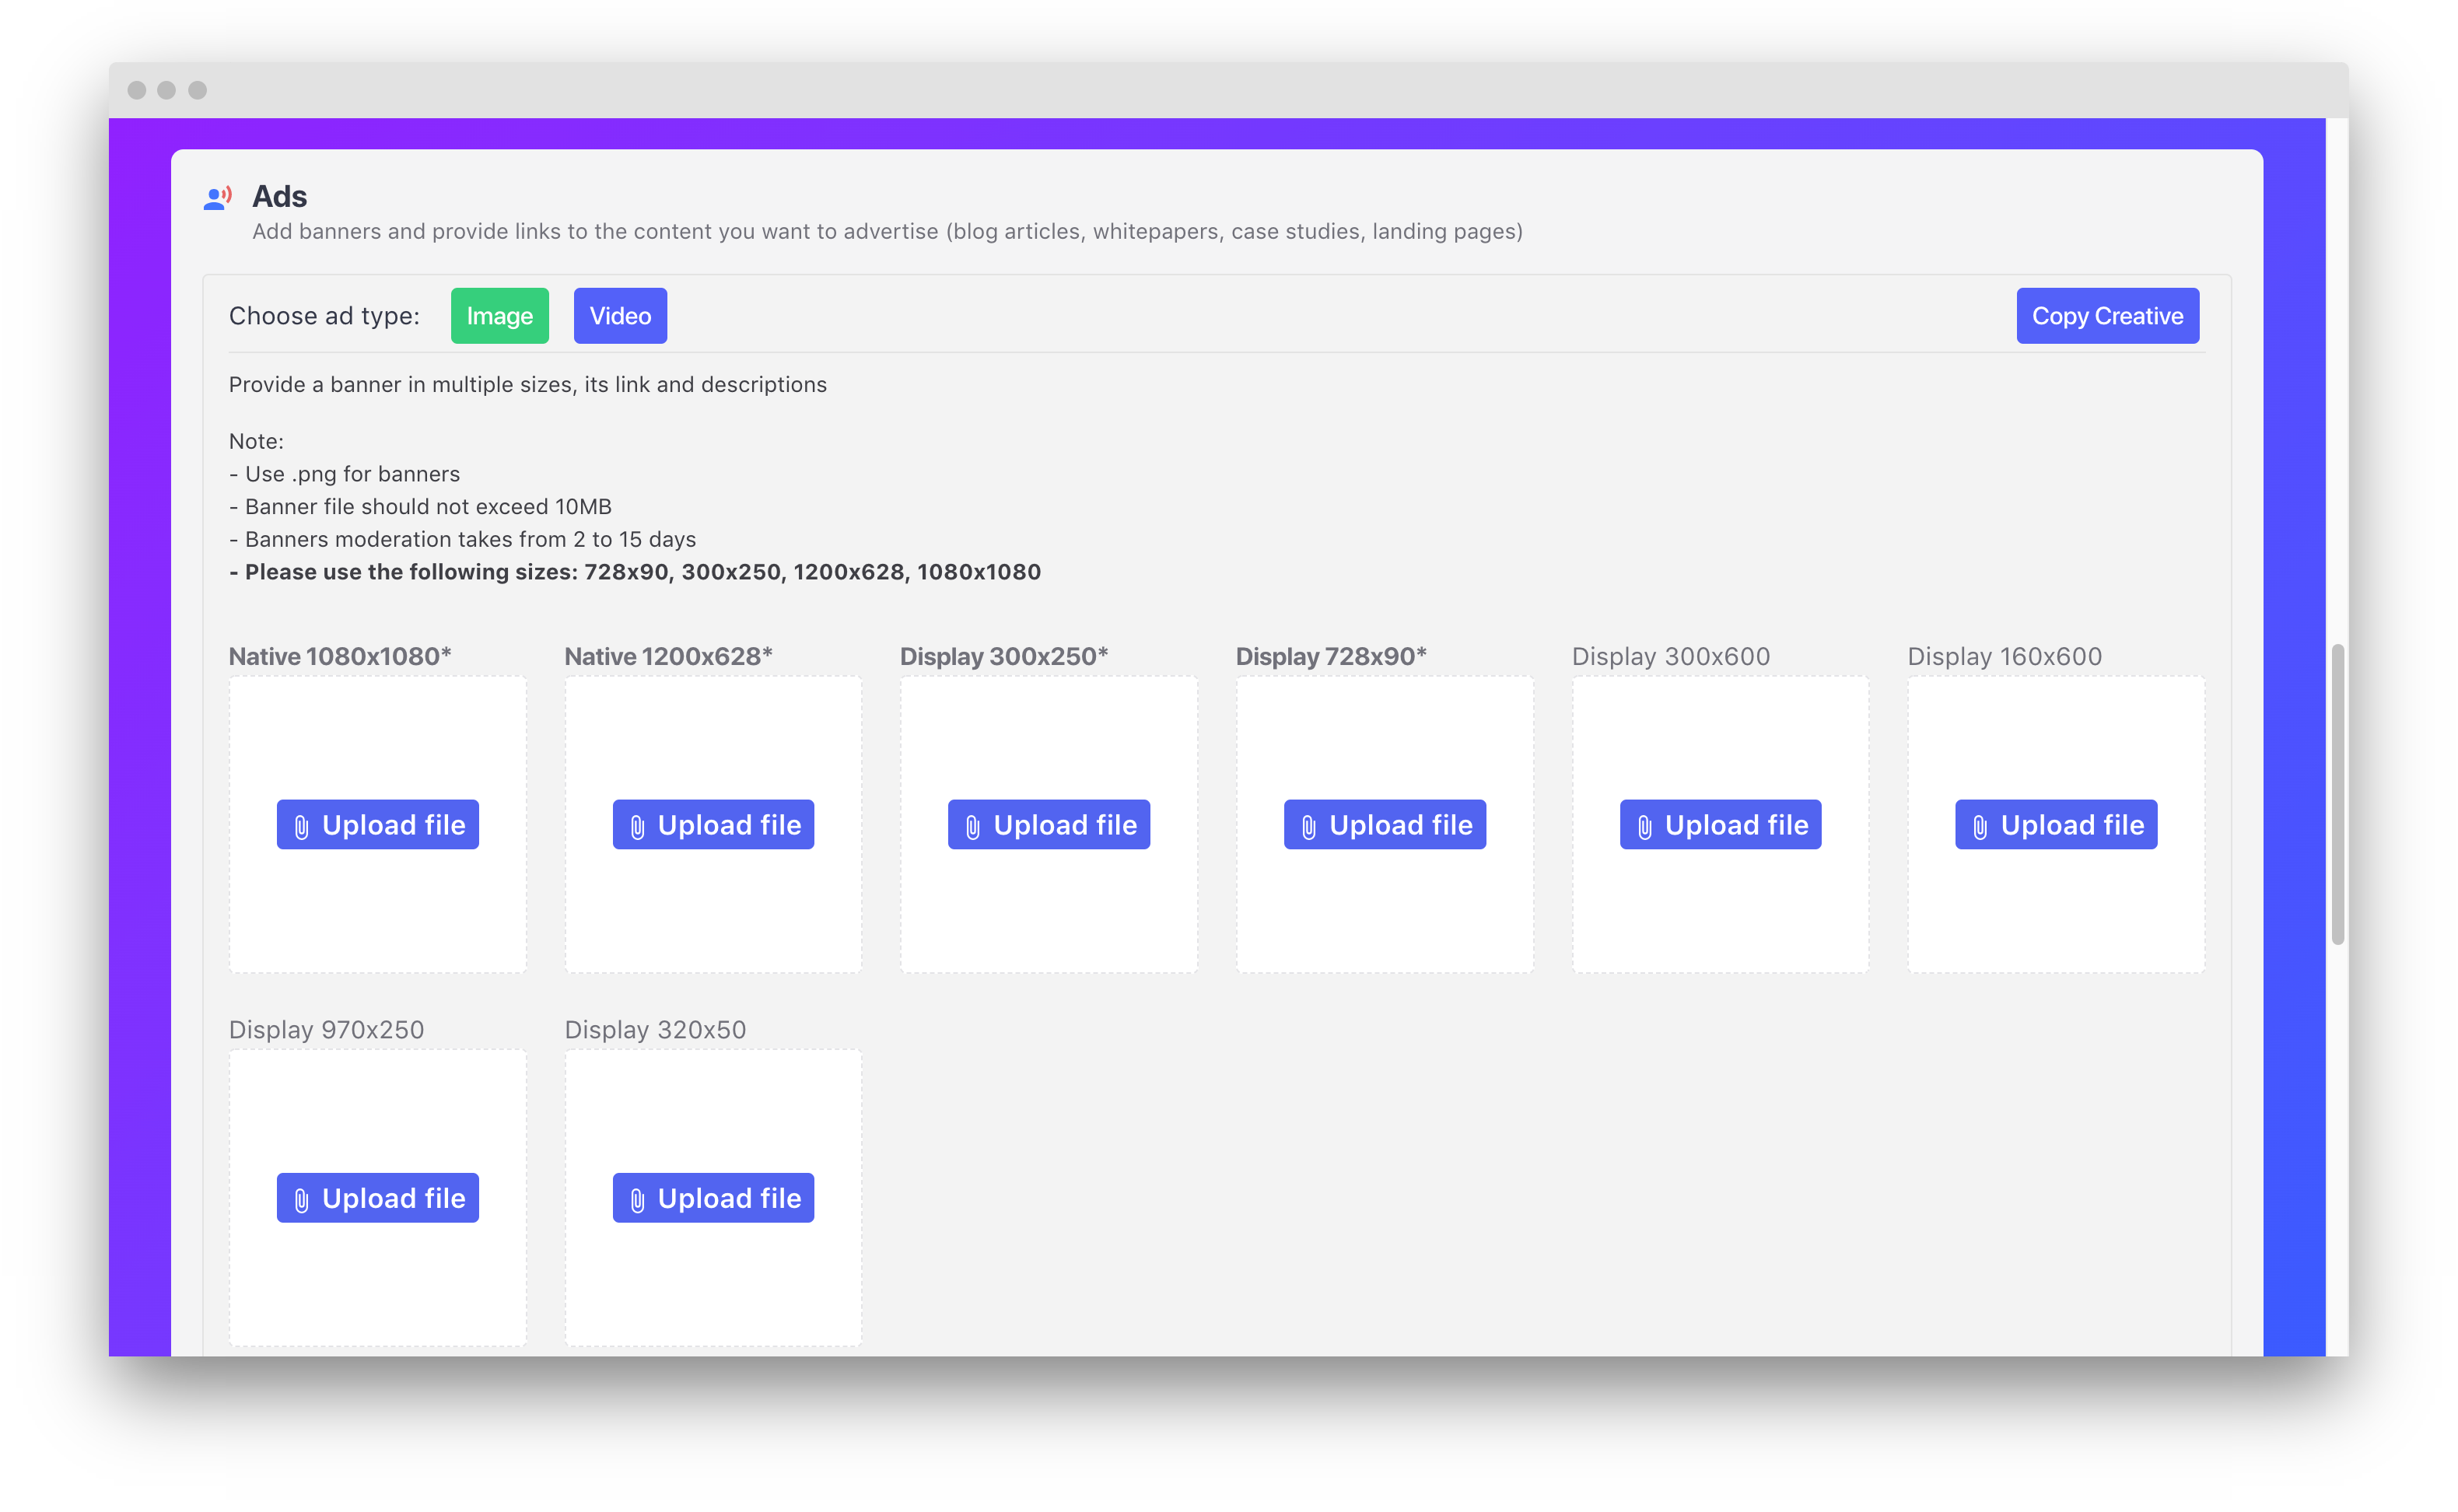
Note: You can easily upload creative in bulk by dropping/selecting all creative at once.

6. After adding your creative, you'll need to add a few more details. See Components of a Native ad for more information on these details.
8. Lastly, you can start your campaign. You simply start a campaign by clicking 'Activate campaign'. Before starting a campaign, you can also click 'Campaign stop date' and select a date to automatically end your campaign on.
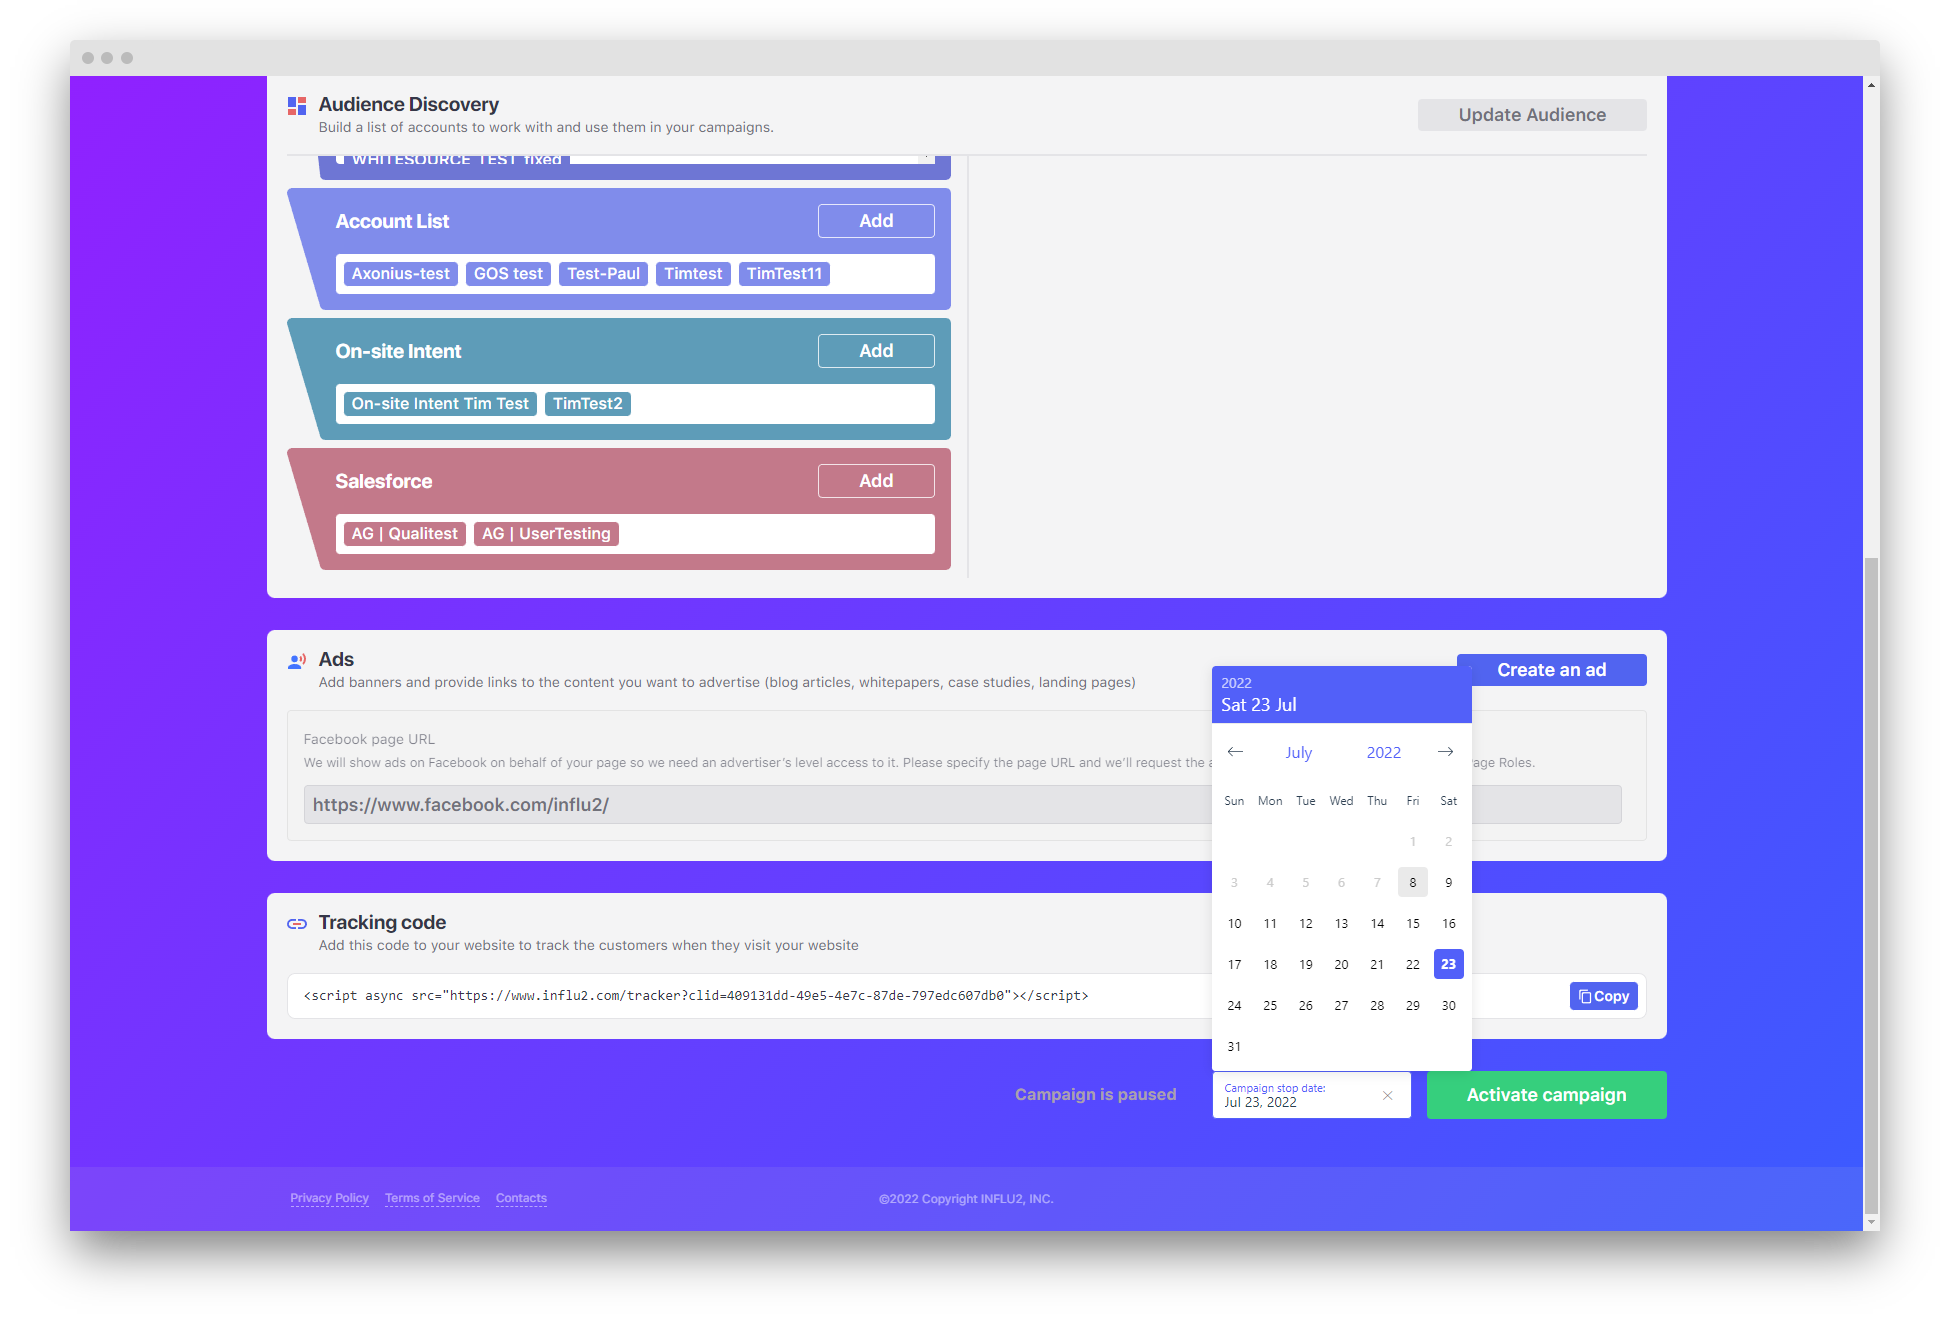
Note: Campaigns must go through a moderation period before they officially go live. Once it's live, stop the campaign at any time.
Enjoy using Influ2!
Comments
0 comments
Please sign in to leave a comment.